Shows
Version 0.5 of Beat Link Trigger introduced a major new set of user interface features called the Show interface, developed in collaboration with the former bass music producer Minnesota, which make it far easier to match tracks, and cause things to happen when particular beat ranges in those tracks are played.
|
Version 7 of BLT takes this to a whole new level, by letting you work with the Phrase Analysis feature in rekordbox to design Phrase Trigger cues that work with any track the DJ has performed phrase analysis on, even with older players that don’t support the Lighting feature. This lets you offer a whole array of attractive, well-synchronized lighting looks even for DJs that you are unable to coordinate with ahead of time. If you thought you could skip over learning about Shows because you don’t plan to assign cues to specific tracks, think again! Phrase Triggers are a powerful, general purpose cue sequencer. |
All of these things could be done before the Show interface (and several people put together quite sophisticated shows) using basic Triggers, but they involved writing a great many custom Expressions to match the tracks and watch for the right beats, and were very tedious to figure out, requiring lots of time hooked up to CDJs during the design process.
Also, there is a practical limit to how many Triggers you can have in your file, because each one gets considered in sequence whenever a packet is received from a player. The limit may be a few dozen, or many times more, but eventually your CPU will get busy just evaluating triggers. The Show interface doesn’t have this limitation—it uses a sophisticated and efficient mechanism for recognizing tracks, and allows you to add thousands of tracks to your Shows. Tracks in a Show will not put any load on your CPU until they are actually loaded in a player.
Finally, because tracks can be added to a Show either from players on the network, or by reading them directly from your rekordbox USB or SD media, you can set up your Shows, draw cues on the tracks’ beat grids, with reference to their waveforms, and configure the messages you want the cues to send, even in situations where you don’t have access to CDJs. Almost all the Show interface features are fully functional when Beat Link Trigger is operating in Offline mode, and the ones that don’t make sense are simply hidden from view. This supports a flexible and convenient workflow.
| If you are managing your own tracks rather than working with one or more DJs, and just need a few cues triggered by MIDI notes when particular tracks reach particular places, you might be able to do something even easier than creating a show. Check out how to translate rekordbox cues to MIDI. |
Creating a Show
To use the Show interface, you start by choosing in the Beat Link Triggers window.

This opens a Save dialog where you choose the location and name of your new Show file. Navigate to where you would like to keep it, type a name, and click Save.
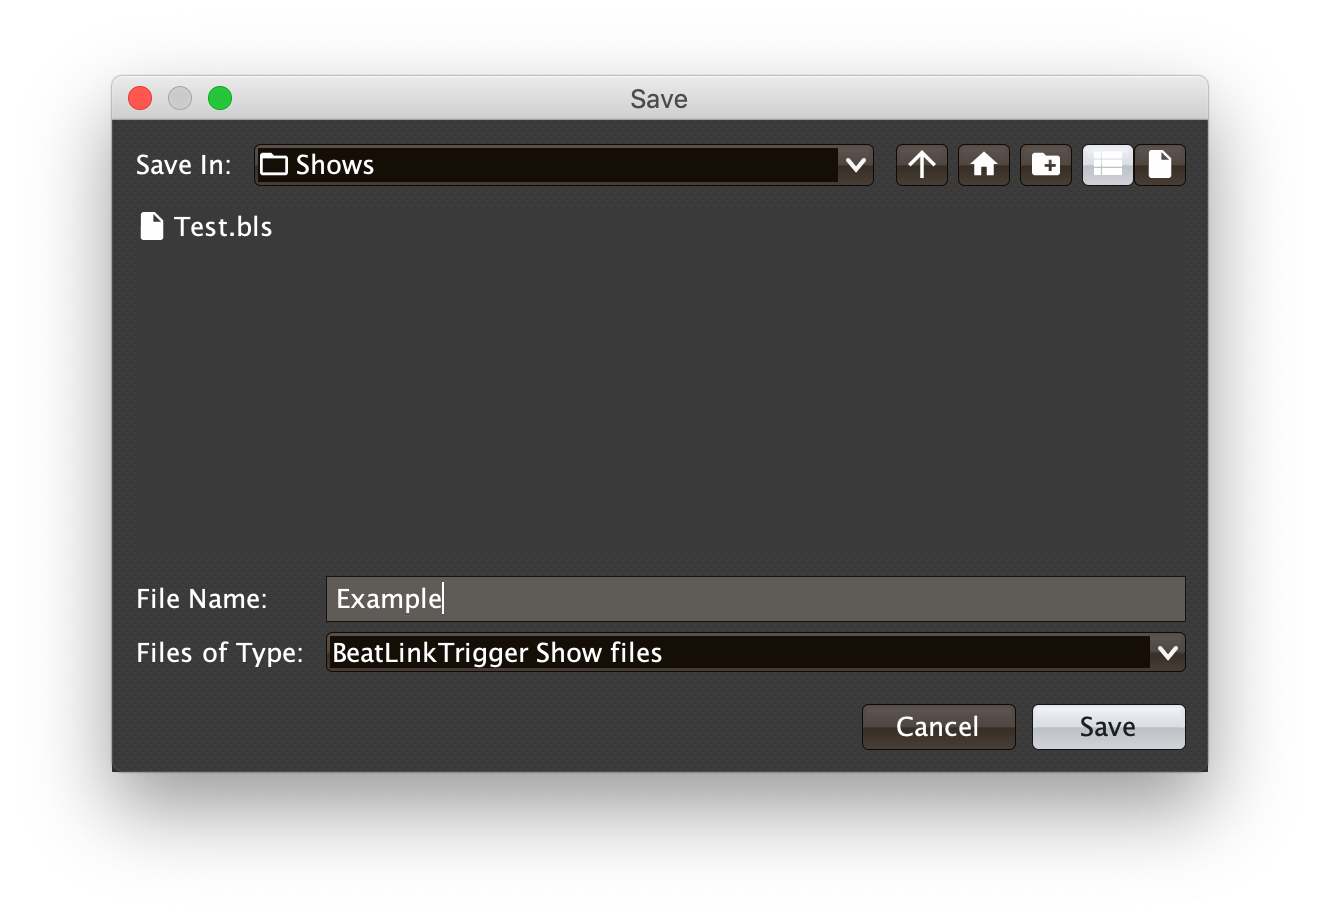
Beat Link Trigger will create a new, empty Show file for you with your chosen name, and open its window. If you quit with a Show window open, it will automatically be reopened the next time you start the program. You can have multiple Show windows open at the same time, in case you want to organize your cues into separate groups for controlling different kinds of integrations (such as perhaps laser cues in one Show, and video cues in another) and each one will be reopened automatically and run independently. You can tailor which Shows you open based on which hardware is being used for a given performance.
|
Opening Shows
Whenever a show is open, it is active (although if your tracks’ Enabled Filters are configured to their Default setting, then you can turn them all off by choosing at the top of the show). You can deactivate the show completely by closing the window. Beat Link Trigger will automatically reopen any shows that were open the last time you quit. If you manually closed a show window but want to activate it now, or you want to open a new show that you received or downloaded, you can open it by choosing in the Beat Link Triggers window and navigating to the show file. |
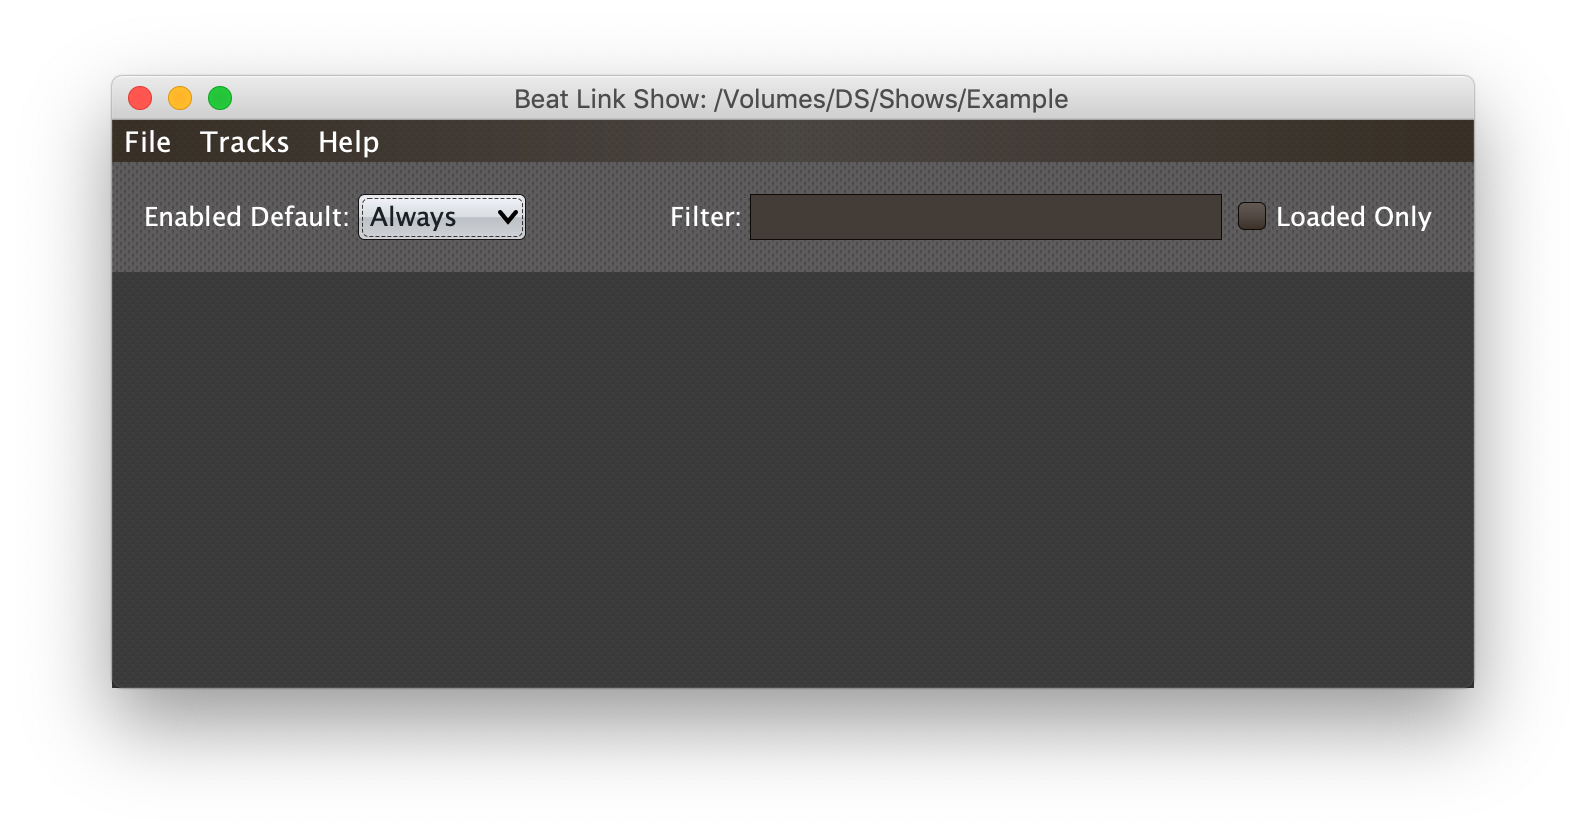
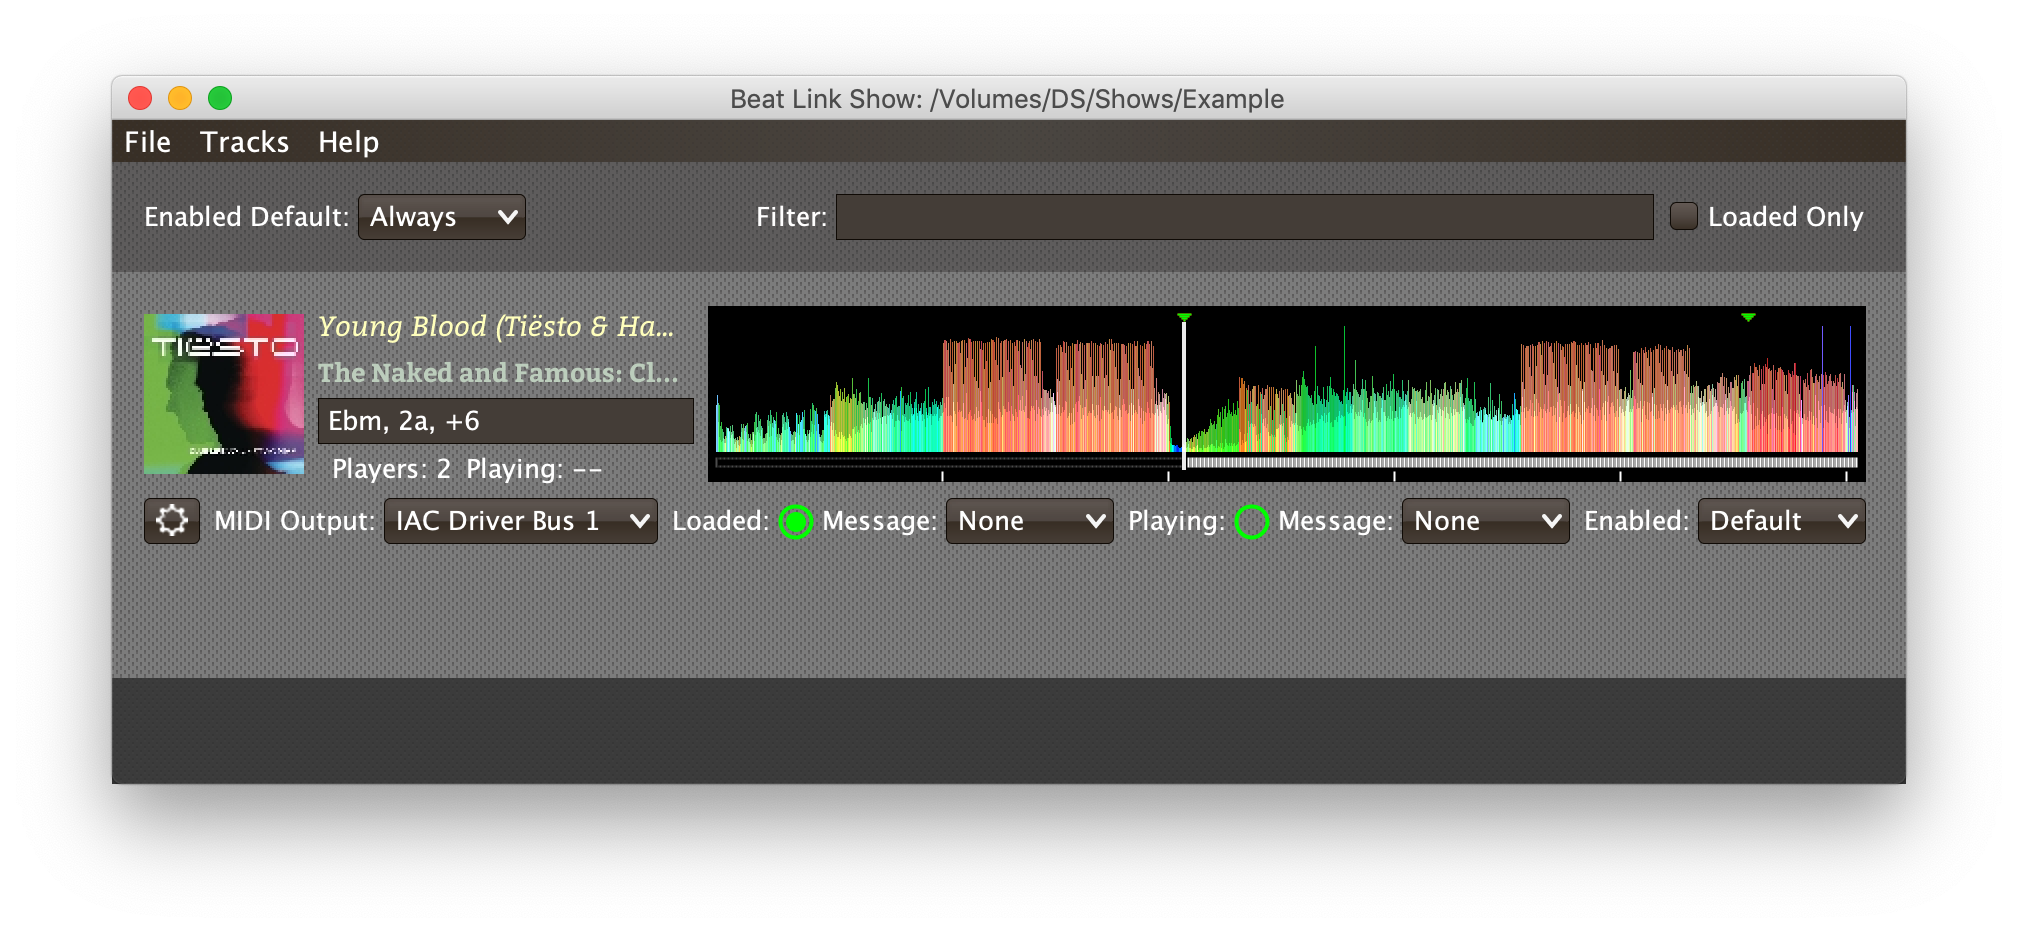
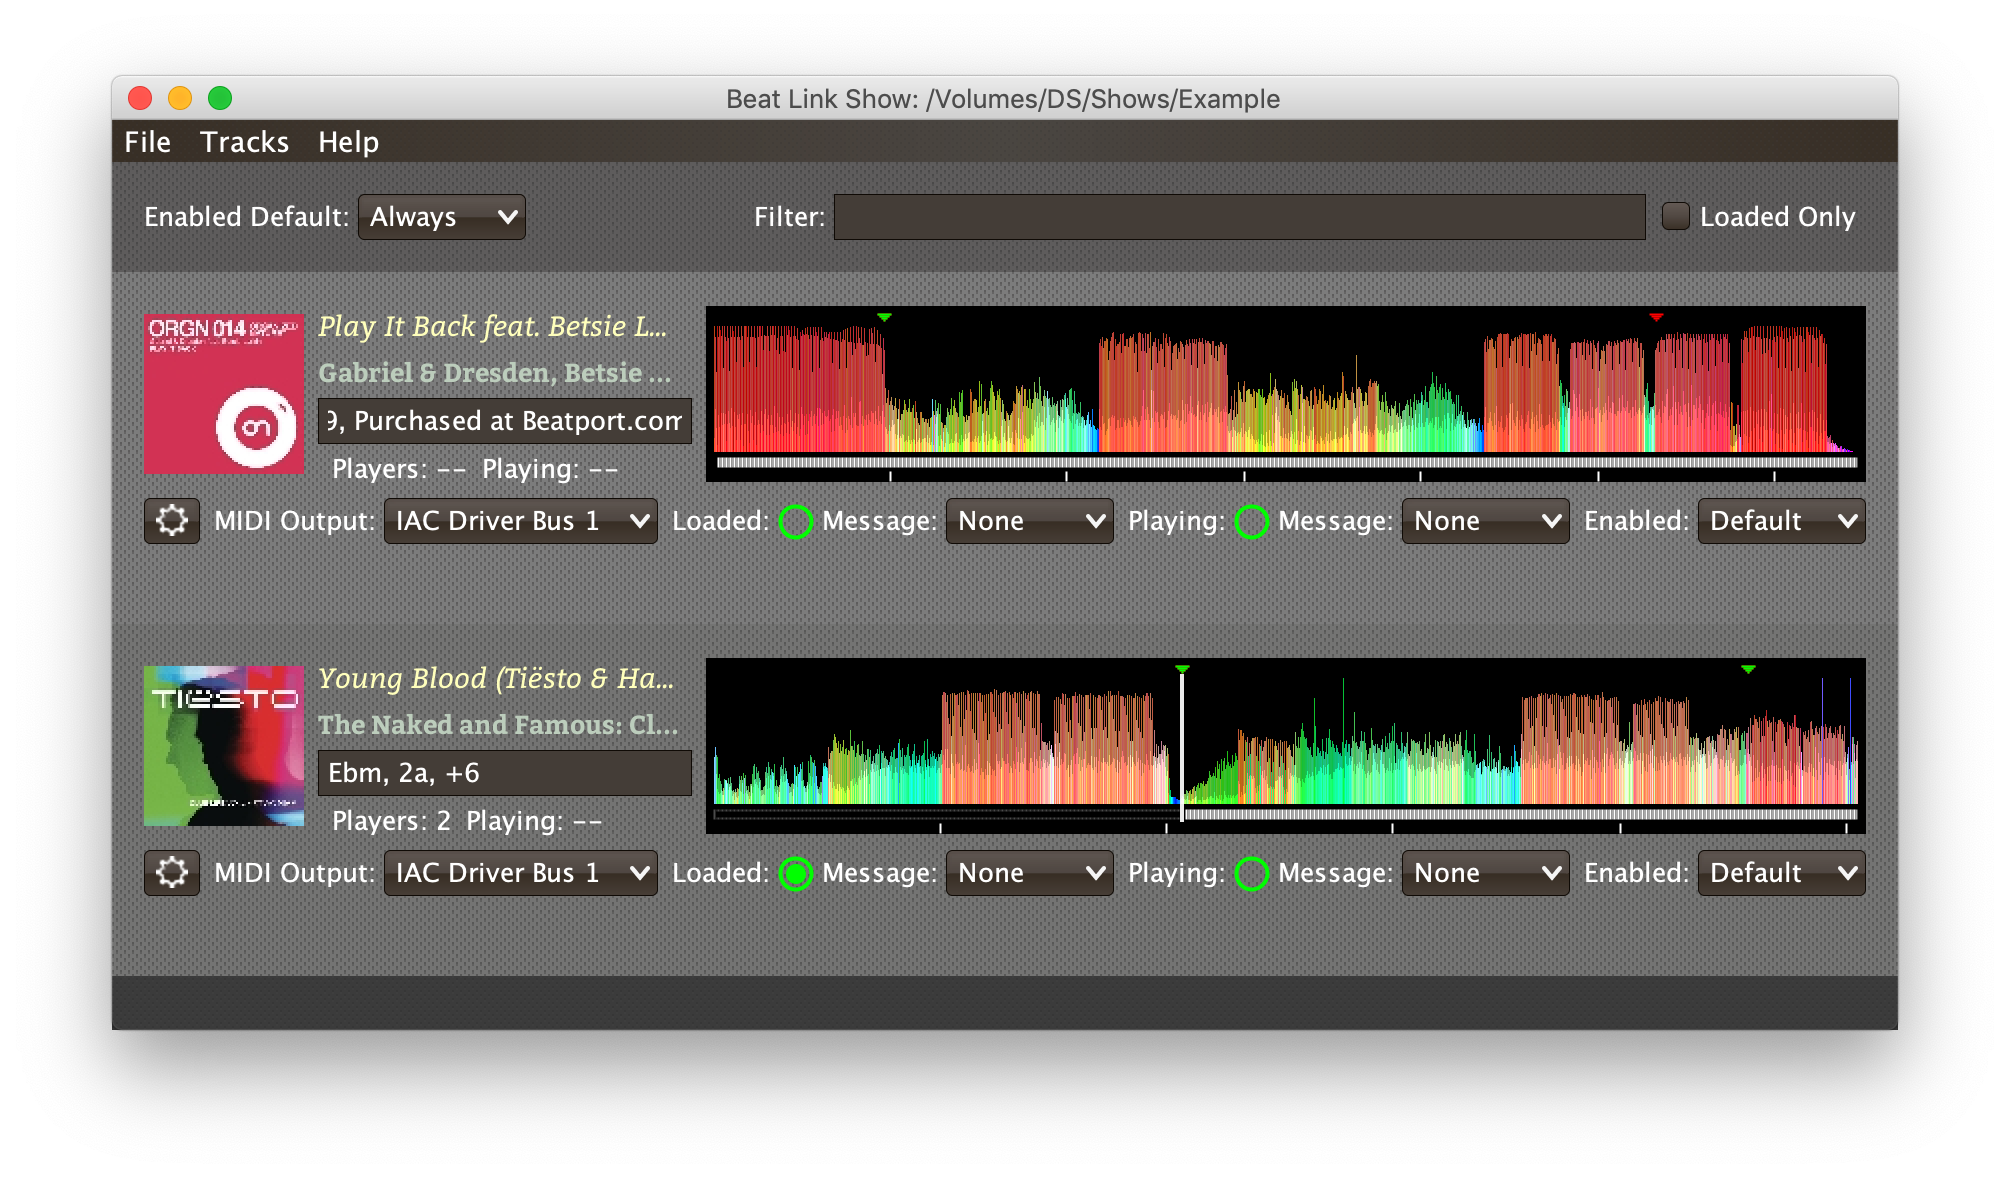
Show Window Header Elements
At the top of the Show window, above any Tracks or Phrase Triggers that you have added to it, is a header that allows you to configure the default Enabled filter (explained below), and to filter which Tracks and Phrase Triggers are currently visible, which is helpful when you have added a lot of them to the Show.
Filtering by Tracks or Phrase Triggers
If you type any text in the Filter box, only tracks and phrase triggers that match that text will be visible.
If you want to restrict your view to only tracks, you can enter track: as the start of your filter text, and any phrase triggers will disappear.
(You can further narrow the search by typing additional text, and only tracks which match that text will be visible).
To see only phrase triggers, enter phrase: as the start of your filter text.
Filtering by Loaded State
Similarly, if you check the Loaded Only checkbox, only tracks that are currently loaded on a player on the network will be visible, and only phrase triggers that match a playing phrase and have been chosen for activation will be visible. This is a great way to narrow down your focus to watch what is going on with tracks the DJ is currently playing.
| The Loaded Only checkbox is only visible when Beat Link Trigger is Online (or you are simulating playback), because otherwise there is no way tracks could be identified as loaded. |
Show Menu Bar
The Show window has its own menu bar with commands that apply to the Show as a whole.
Beat Link Trigger automatically saves the Show when you exit normally, but if you are concerned that your computer might crash and want to avoid the risk of losing data, you can manually save it by choosing . You can also save a copy to a different file at any time using .
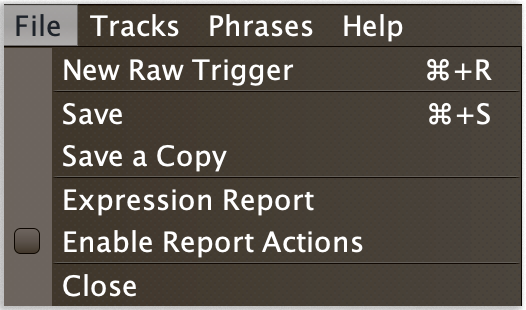
Choosing opens a browser window holding a report that provides a powerful and convenient way of exploring, managing, and simulating all the expressions that you are using in the show. To use the full power of this report you need to choose , but you should only do this on a trusted and private network, because any other machine on the network will then be able to trigger simulations of your expressions, or manipulate the Beat Link Trigger interface in the ways the report can.
If you want to stop working with a show, and don’t want Beat Link Trigger to automatically open it the next time you launch the program, choose .
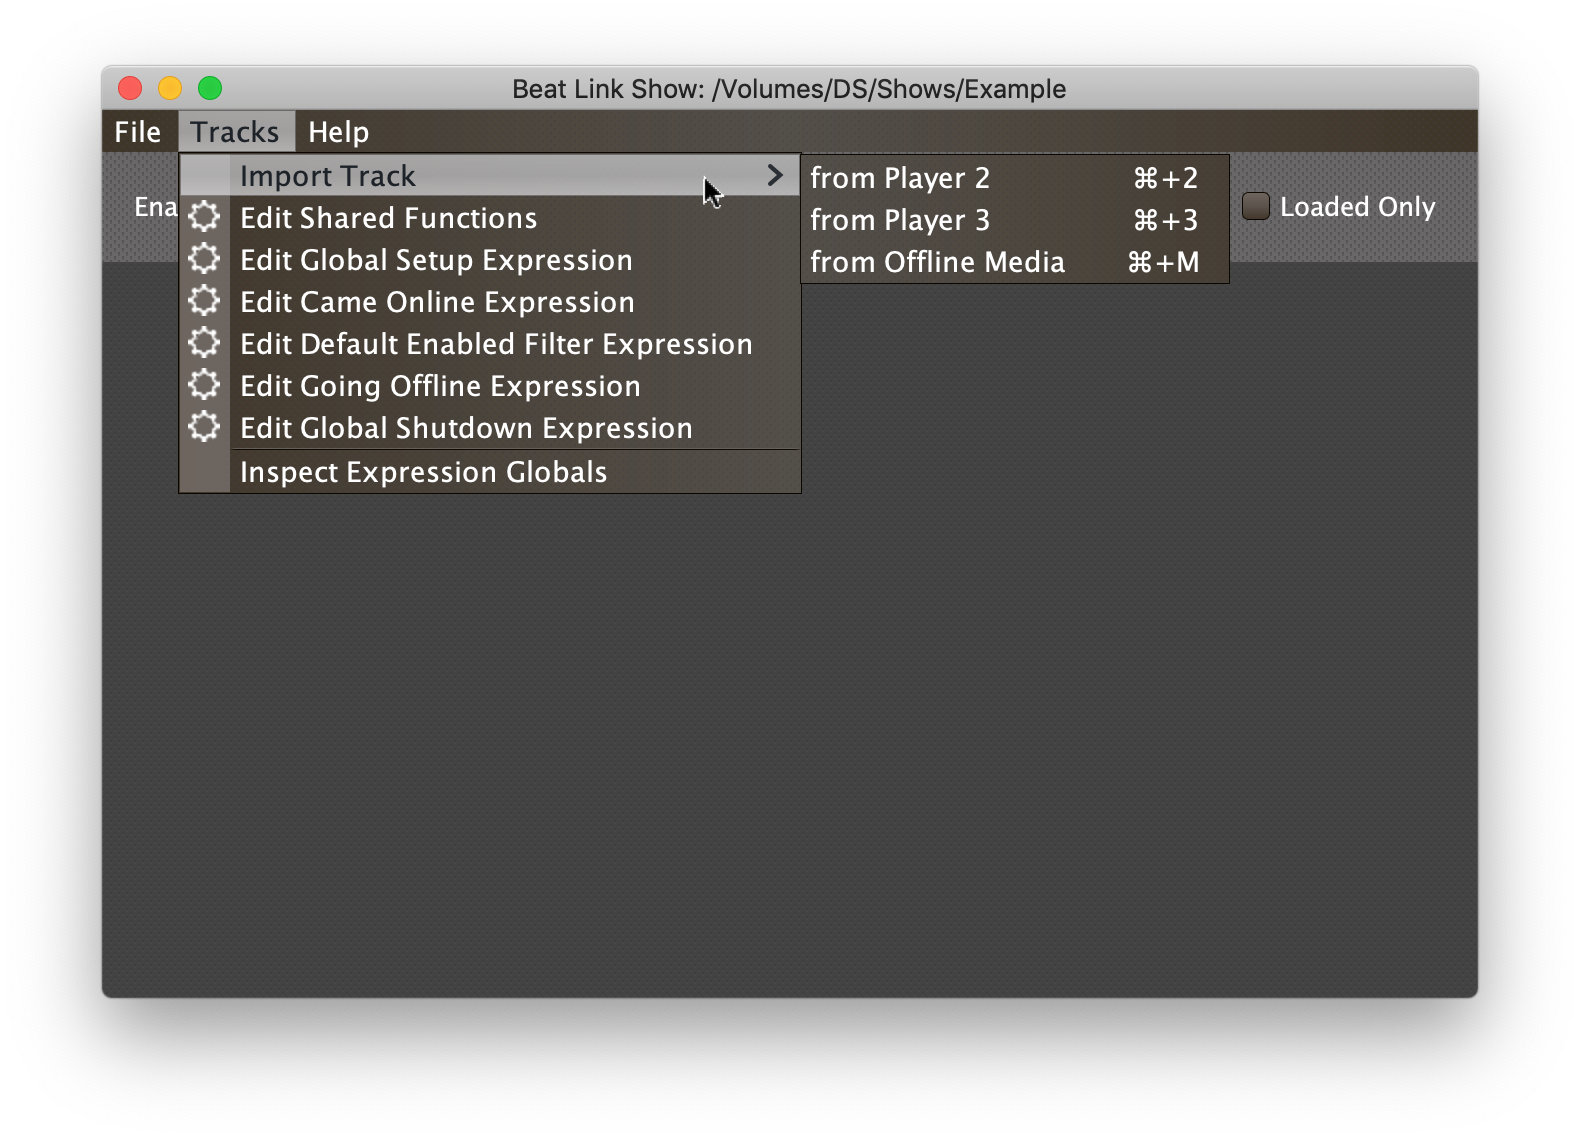
The Tracks Menu allows you to add tracks to the show, as discussed in the next section, and to edit expressions that customize the show as a whole, as described in the Expressions section.
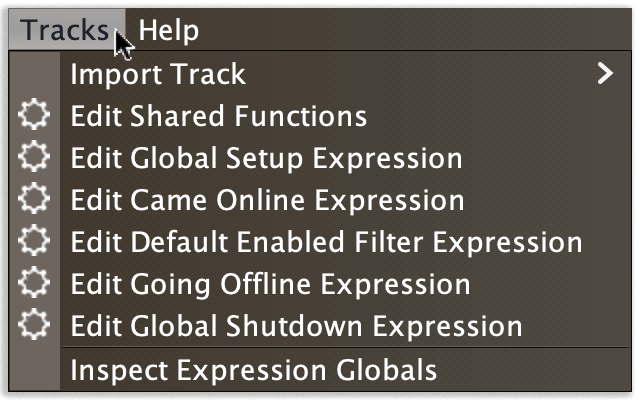
The Inspect Expression Locals option allows you to explore any values that have been set up by expressions to share across the entire Show.See Inspecting Locals and Globals for more details.
The Help Menu is the same as in the Triggers window, providing a variety of helpful information and shortcuts for getting support.
Enabled Default
Each track can have its own Enabled filter, which determines whether the show will react to players doing things with the track. Often, every track in the show will want to follow the same rules, so you can configure those rules using the show’s Enabled Default setting, and leave each track’s Enabled filter set to Default. Any tracks which have more specific needs can switch their Enabled filter to a different setting.
If the track’s Enabled filter is set to Default, the value of the Show’s Enabled Default filter is used. It has the following options:
- Never
-
With this setting, all such tracks are disabled until you re-enable them.
- On-Air
-
With this setting, the tracks are enabled whenever they are loaded by at least one player that reports that it is On the Air. (For that to work, the player must be connected via Ethernet to a Pioneer mixer that is from the Nexus generation or later, and must have the feature turned on, or if the mixer supports MIDI, you can use an integration show to add this feature.)
If you work with a DJ who likes to fade out his tracks to coax the audience into singing along, you might be interested in using the example Custom Default Enabled Filter Expression rather than this setting. - Master
-
With this setting, the tracks are enabled whenever they are loaded by the player that is the current Tempo Master.
- Custom
-
With this setting, the tracks are controlled by an Enabled Filter Expression, some Clojure code that you write yourself (or receive from someone). Whenever a status update is received from any player, your filter expressions are evaluated. If the last expression in your filter returns a
truevalue, the tracks will be enabled. This lets you apply sophisticated logic, like enabling the tracks when another track is loaded into a different player, or only during particular times of day. For details see the Expressions section. If you chooseCustomand have not yet written an Enabled Default Filter expression, the expression editor will be opened to let you do that. You can also always open that editor using the Tracks Menu, described above. - Always
-
With this setting, the tracks are enabled until you disable them.
Adding Tracks to a Show
Shows don’t do anything until they include at least one Track or Phrase Trigger. There are a number of different ways you can add Tracks to your Show. Most of them can be found by choosing in the Show window menu bar:
Adding Tracks from a Player
If you are currently Online, and there are any players on the network that have rekordbox tracks loaded that are not already part of the Show, you will see them as options in the menu. Choosing (for example) will download that track from the player, and add everything needed to work with it to the Show file (the elements of a Track row are explained below, after the other ways of adding them to a Show).
To help avoid confusion, rather than simply having the player disappear from the list of import choices if the track it has loaded is already part of the Show, the menu option is disabled and an explanation is added:

|
You should finish making any adjustments to your tracks in rekordbox, including fine-tuning their beat grids, before you add them to your show. Beat Link Trigger recognizes tracks by calculating a “signature” that includes such details. If you change any of these things after importing the track, it will no longer be recognized, and your cues and other expressions will not work. If this happens, you can import the new version of the track, copy the contents of the old version of the track in your show into the new one, then remove the old version. |
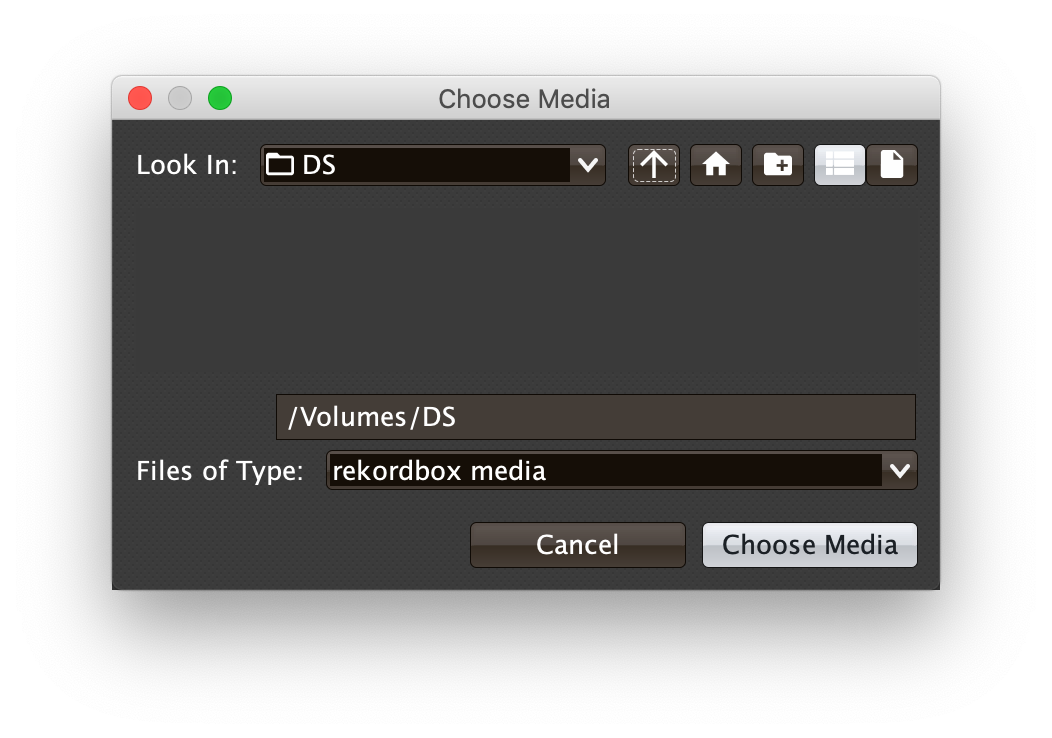
Adding Tracks from Offline Media
To make it possible to set up your Show even when you don’t have access to your player network, you can also import Tracks directly from rekordbox USB or SD media. To do that, mount the media on your computer, and choose . A Choose Media dialog will appear, from which you can navigate to the media:
Once you click Choose Media, the exported database is parsed, and a Choose Track window is presented, which is very similar to the Loading and Playing Tracks interface offered by the Player Status window (see that section for details about how to navigate the interface and use the Search feature):
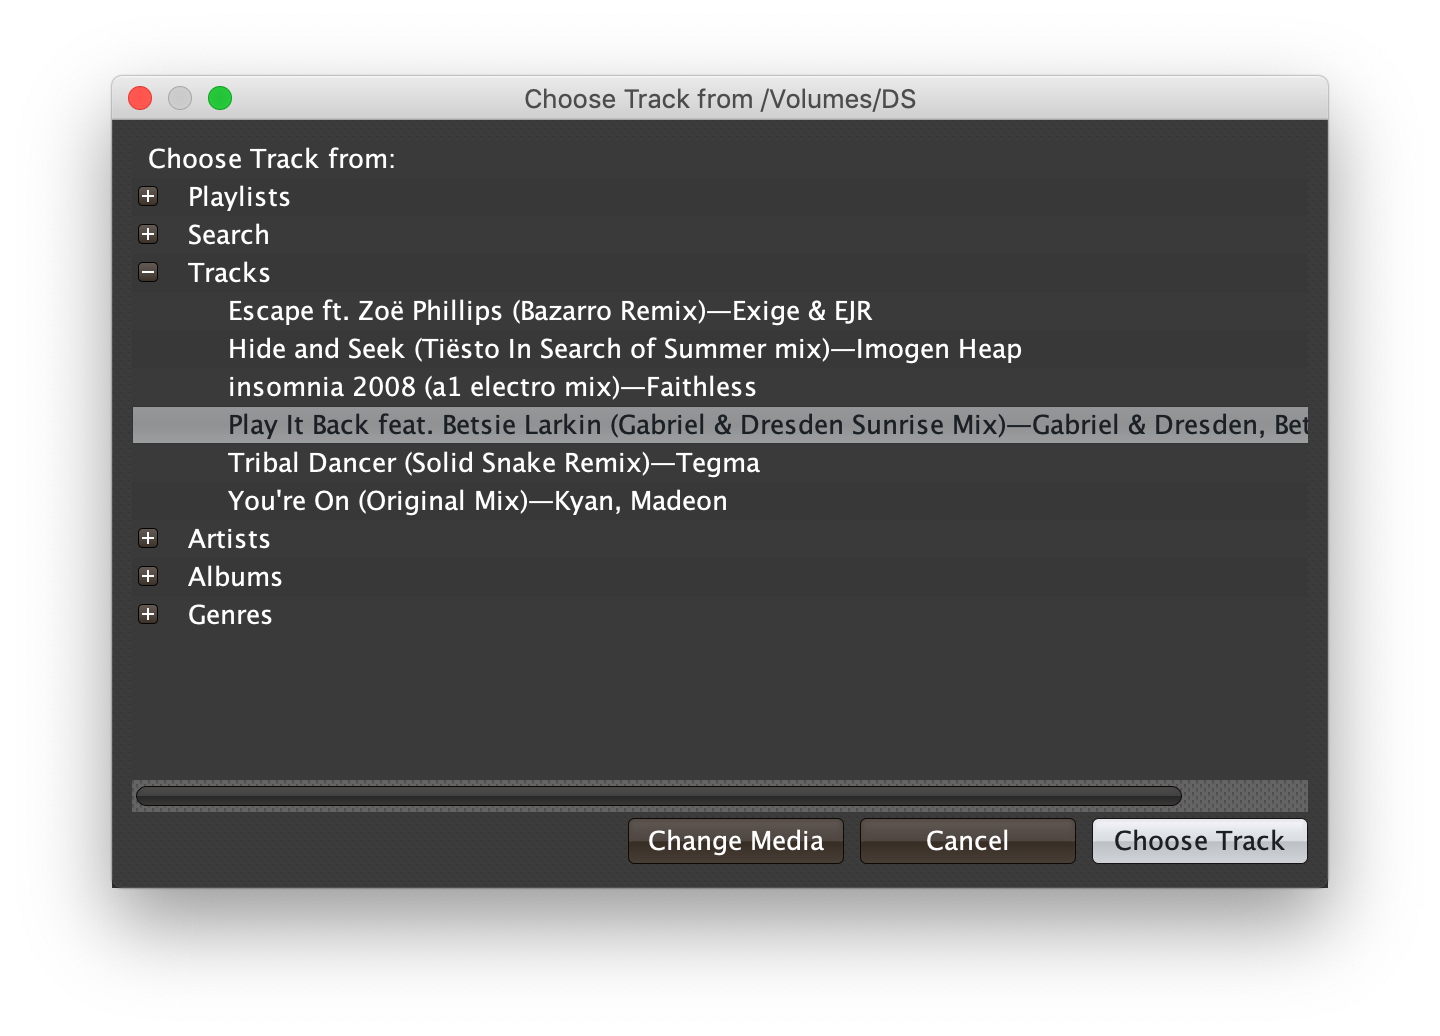
Once you have found the Track you are looking for, click Choose Track to add it to the Show.
|
To save time, once you have chosen media to load tracks from during a Beat Link Trigger session, your media choice is remembered (and the parsed database export is kept open), so the next time you choose to import from offline media, the media selection window is skipped, and you are taken right to the track selection window. If you want to import from different media, click the Change Media button at the bottom of the window. This also means you will not be able to eject the media on most operating systems because BLT has it open; if you do need to eject it without quitting BLT, choose , click Change Media, and it will be closed so you can eject it. At that point you can click Cancel if you did not actually want to import a Track. If you have an entire playlist of tracks that you want to import into a show, you can use the Import Playlist button to switch to an interface which shows only playlists and allows you to choose one. If you do so, a progress bar will provide feedback as the tracks from that playlist are imported, and allow you to stop the process. If you decide you only want to import a single track after all, prior to choosing a playlist you can click Import Single Track to return to the normal track selection interface. |
Copying Tracks between Shows
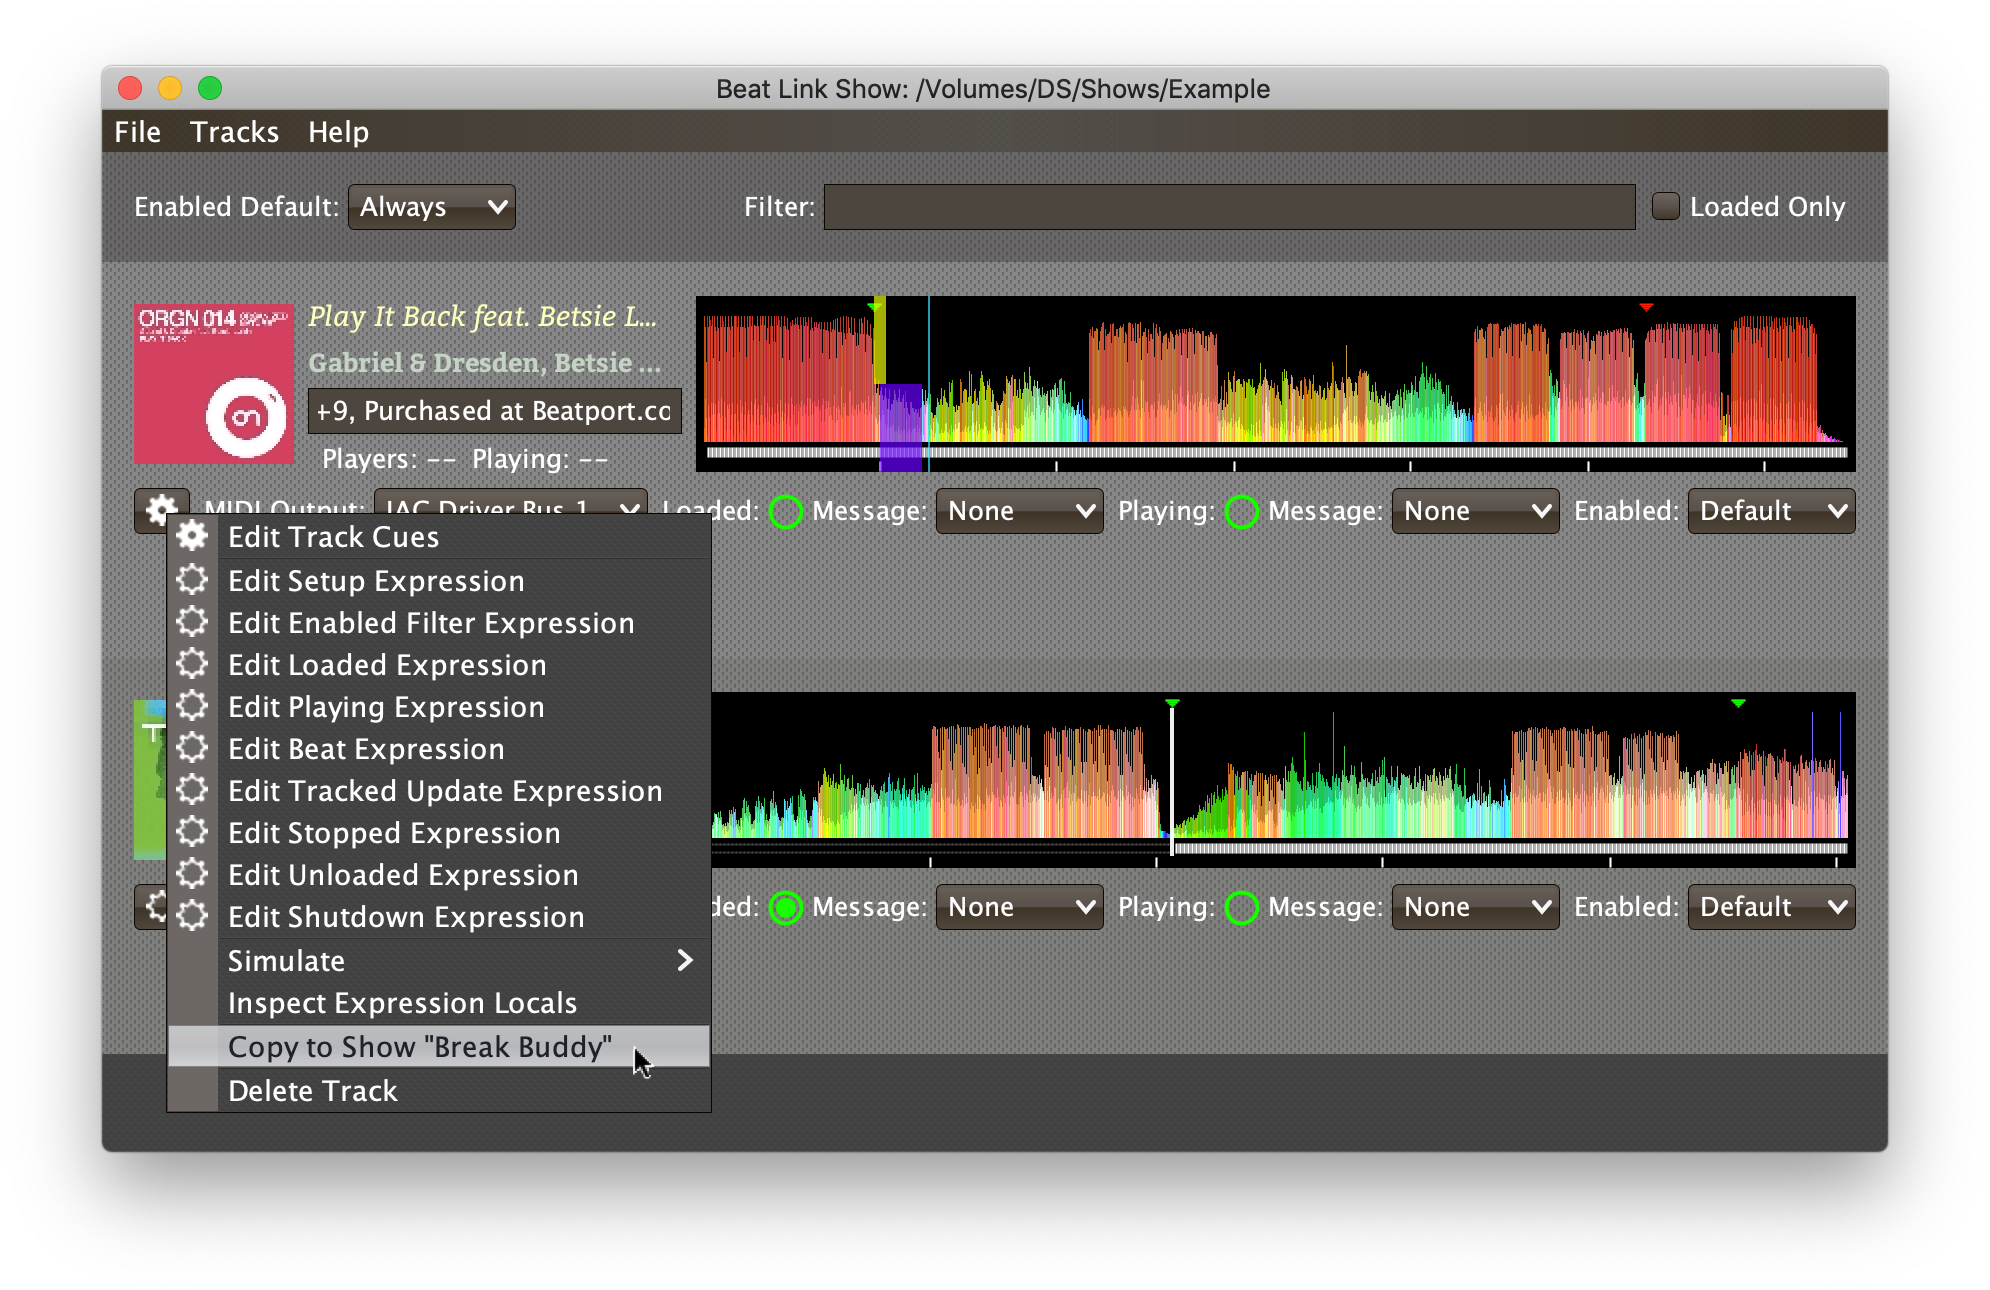
The final way to add a Track to a Show is to copy it from another Show. When you have multiple Show windows open, you can copy Tracks from one to another by finding the Track in the open Show that already contains it, then choosing Copy to Show “<name>” in the Track’s context menu:
| If you don’t see an open Show in the Copy to list, that means the Track is already present in the other Show. |
Copying Track Contents
Although the cues you have created in a track are likely to be very specific to that track, there are times you might want to copy all the configuration, expressions, and cues you have set up in one track to another.
One situation where this is certain to be useful is if you have made changes to your track after you imported it into the show, and this has caused it to stop being recognized. In that case, you can import the track again, and copy the content from the old version to the new version before deleting the old version.
There are other situations where this might be useful as well. Even if the tracks are different enough that you will need to move the cues around a lot, copying the overall track configuration, expressions, and sometimes even cues can save you time.
To copy the contents of a track, hold down the Shift key while bringing up the Track context menu (clicking on the gear icon or right-clicking in the track row outside the waveform). This will bring up a special menu:
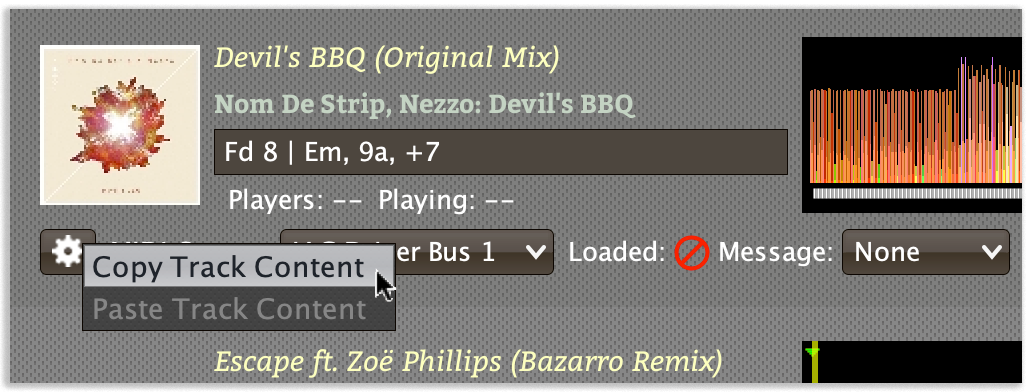
Once you have chosen Copy Track Content on a track, when you use Shift to bring up this menu again on a track (in this show or any other), the option to paste that content will be enabled.
Choosing Paste Track Content will bring up a confirmation dialog because this is a destructive process which cannot be undone (unless you have saved a backup copy of your show):
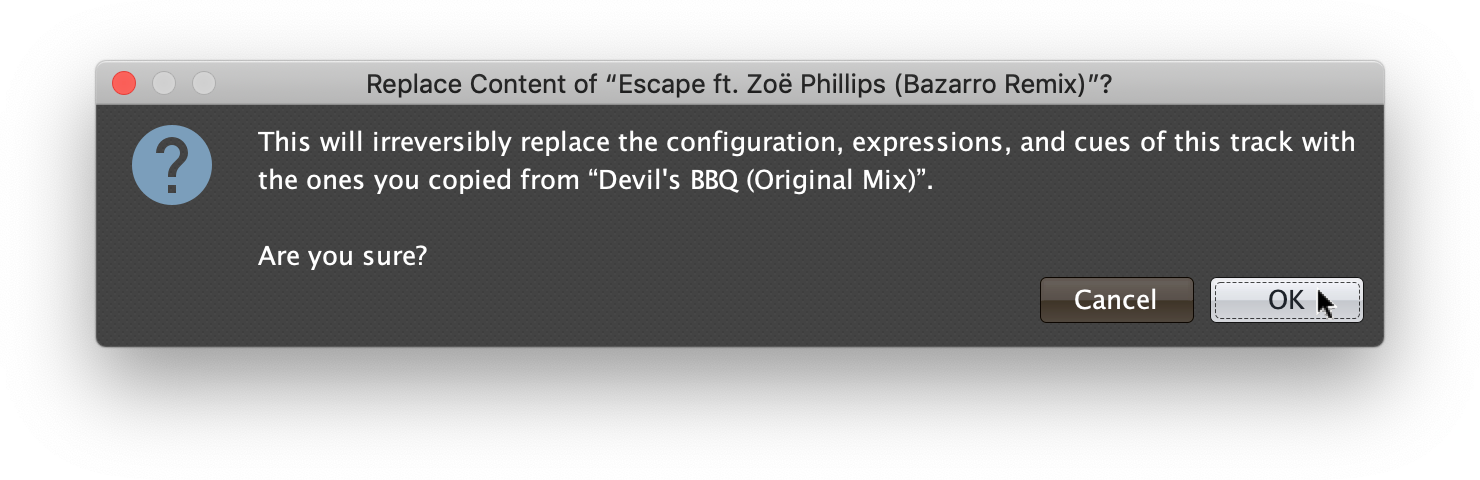
If you click OK, all the destination track’s configuration (MIDI Output, Messages, Channel, and Enabled Default), its expressions, and its cues (including their own configuration and expressions) will be replaced by the ones that you copied earlier. Any cues that would extend past the end of the new track will be cropped to end on its final beat, and any which would have started after the end of the track will simply be removed.
You can then proceed to adjust the cue positions if needed, and tweak other details to make the track work the way you want it to.