Settings
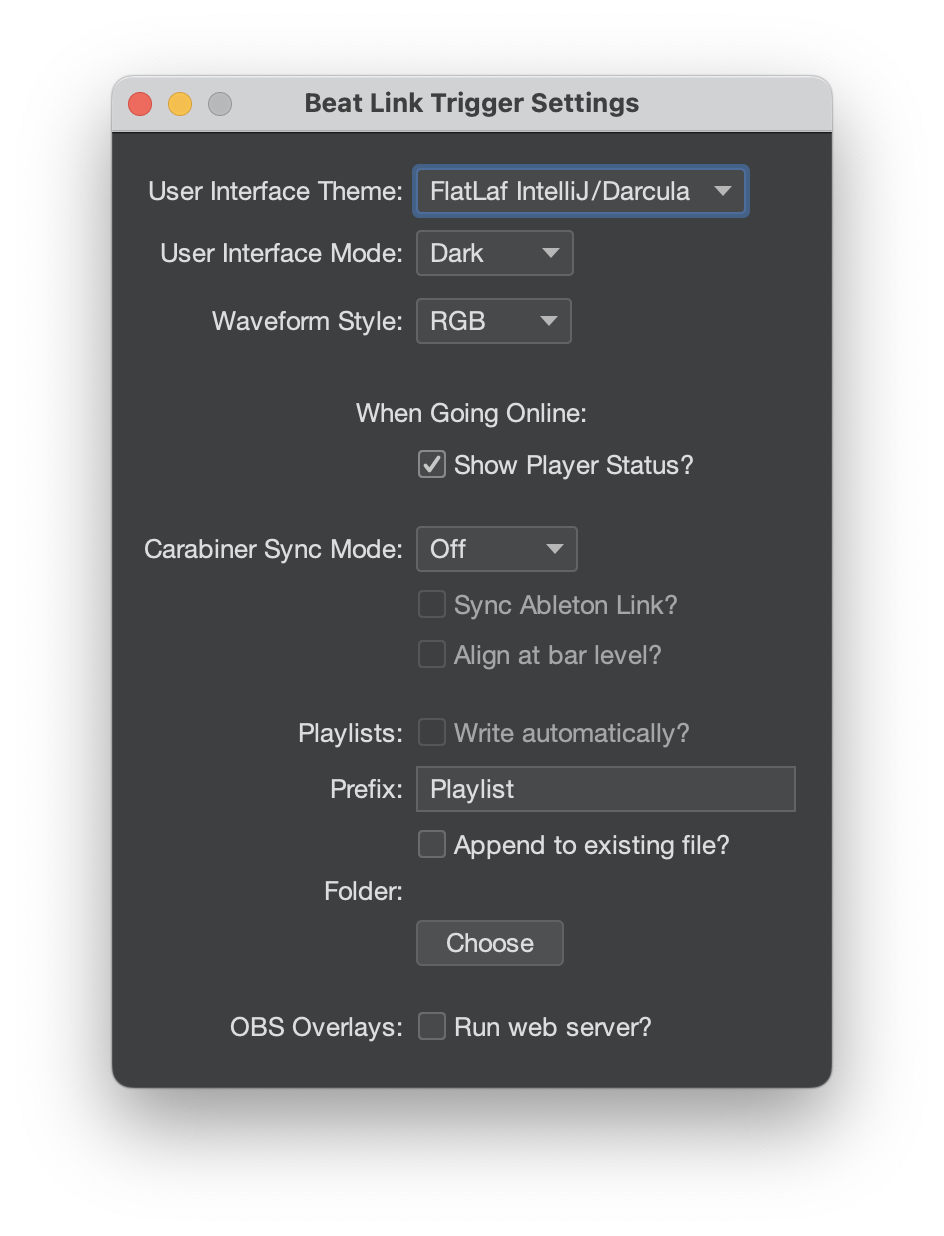
The Settings window allows you to customize elements of the user interface, as well as configuring some windows to open automatically when Beat Link Trigger goes online.
Opening Settings
On the Mac, the Settings window is accessed through the application menu in the menu bar, or using the standard key combination ⌘+,. On other platforms, you will find it as
User Interface
The first setting options concern the user interface theme. The Look and Feel that had been used since the beginning of Beat Link Trigger has not been maintained for years, and was starting to exhibit visual glitches on high-DPI displays. The replacement that was chosen, FlatLaf, supports theming options, as well as light/dark variants. You can choose the basic theme using the first menu, User Interface Theme.
User Interface Themes
There are four theme choices available, which (combined with light and dark mode) provide access to the six FlatLaf Core Themes, and allow you to configure and use your own custom light or dark mode theme. The best way to understand them is to try them and see which you like, but here are brief descriptions:
- FlatLaf IntelliJ / Darcula
-
Darcula (the theme that is used when in dark mode) is closest to the feel of the original Beat Link Trigger interface, so this option is chosen when you first start using version 8 of BLT. In light mode, the interface is similar to the IntelliJ IDEA development environment, which Deep Symmetry uses for Java code.
- FlatLaf Default
-
This is what the designers of the FlatLaf package chose as their standard option. It is more subdued than the other options, so you may find it less distracting, but all are clean.
- FlatLaf macOS
-
This makes the interface look closer to a standard Mac application.
- Custom
-
This allows you to install and use other theme definitions, if none of the standard ones appeal to you. Until you have installed and configured them, as described next, choosing this is the same as choosing FlatLaf IntelliJ / Darcula.
Configuring Custom Themes
To keep the Beat Link Trigger application from growing any faster than it is, only the standard themes are packaged with it. You don’t need to be limited by that, however, thanks to BLT’s ability to load libraries at runtime. For example, to use the IntelliJ Platform Themes shown lower on the FlatLaf Themes page, you could put code like this in your Global Setup Expression:
(add-library '[com.formdev/flatlaf-intellij-themes "3.6"])
(prefs/register-custom-theme true
  (Class/forName "com.formdev.flatlaf.intellijthemes.FlatMaterialDesignDarkIJTheme"))
The first line adds the theme pack to the libraries available to Beat Link Trigger (the first time you do this, you will need to be connected to the Internet so the file can be downloaded, but after that a cached copy created by Maven in the .m2 folder in your home directory will be used).
The second line configures the dark-mode Custom theme to be the Material Design Dark theme, using the class name listed in the theme pack documentation.
Once this is in place, if you chose Custom as your user interface theme, and you are in dark mode (further described below), you will see the Material Design Dark theme.
If you want to configure a custom theme for light mode, pass false as the first argument to prefs/register-custom-theme, then pass the class you want to register for it.
User Interface Modes
As noted above, the user interface themes are grouped into light and dark pairs, and you can choose which you want to use with the User Interface Mode menu. It offers three choices:
- Light
-
Backgrounds that are close to white, with darker text, like the pages of a book or this user guide.
- Dark
-
Backgrounds that are close to black, with lighter text. When you first start using version 8 of BLT this mode is chosen, because it is similar to the interface offered by earlier versions, and most show production software uses interfaces like this.
- System
-
Will choose Light or Dark based on the overall setting of your operating system. This includes automatically switching between light and dark depending on the time of day, if your OS offers this feature.
Waveform Style
The preferred style used to draw track waveforms can be set using the Waveform Style menu. The default is to draw Nexus 2000 style RGB waveforms, but you can now also choose CDJ-3000 style three-band waveforms.
You can also use the older monochrome blue waveforms (this was previously possible using a Global Setup Expression, but it is now exposed in the Settings window).
If your preferred waveform style is not available for a track because rekordbox did not export it, then the best available waveform will be displayed instead. When tracks are imported into shows, the waveform style that is in effect at that time will determine how the track looks in the show.
Actions Going Online
The remainder of the Settings window allows you to configure additional things to happen when Beat Link Trigger goes online.
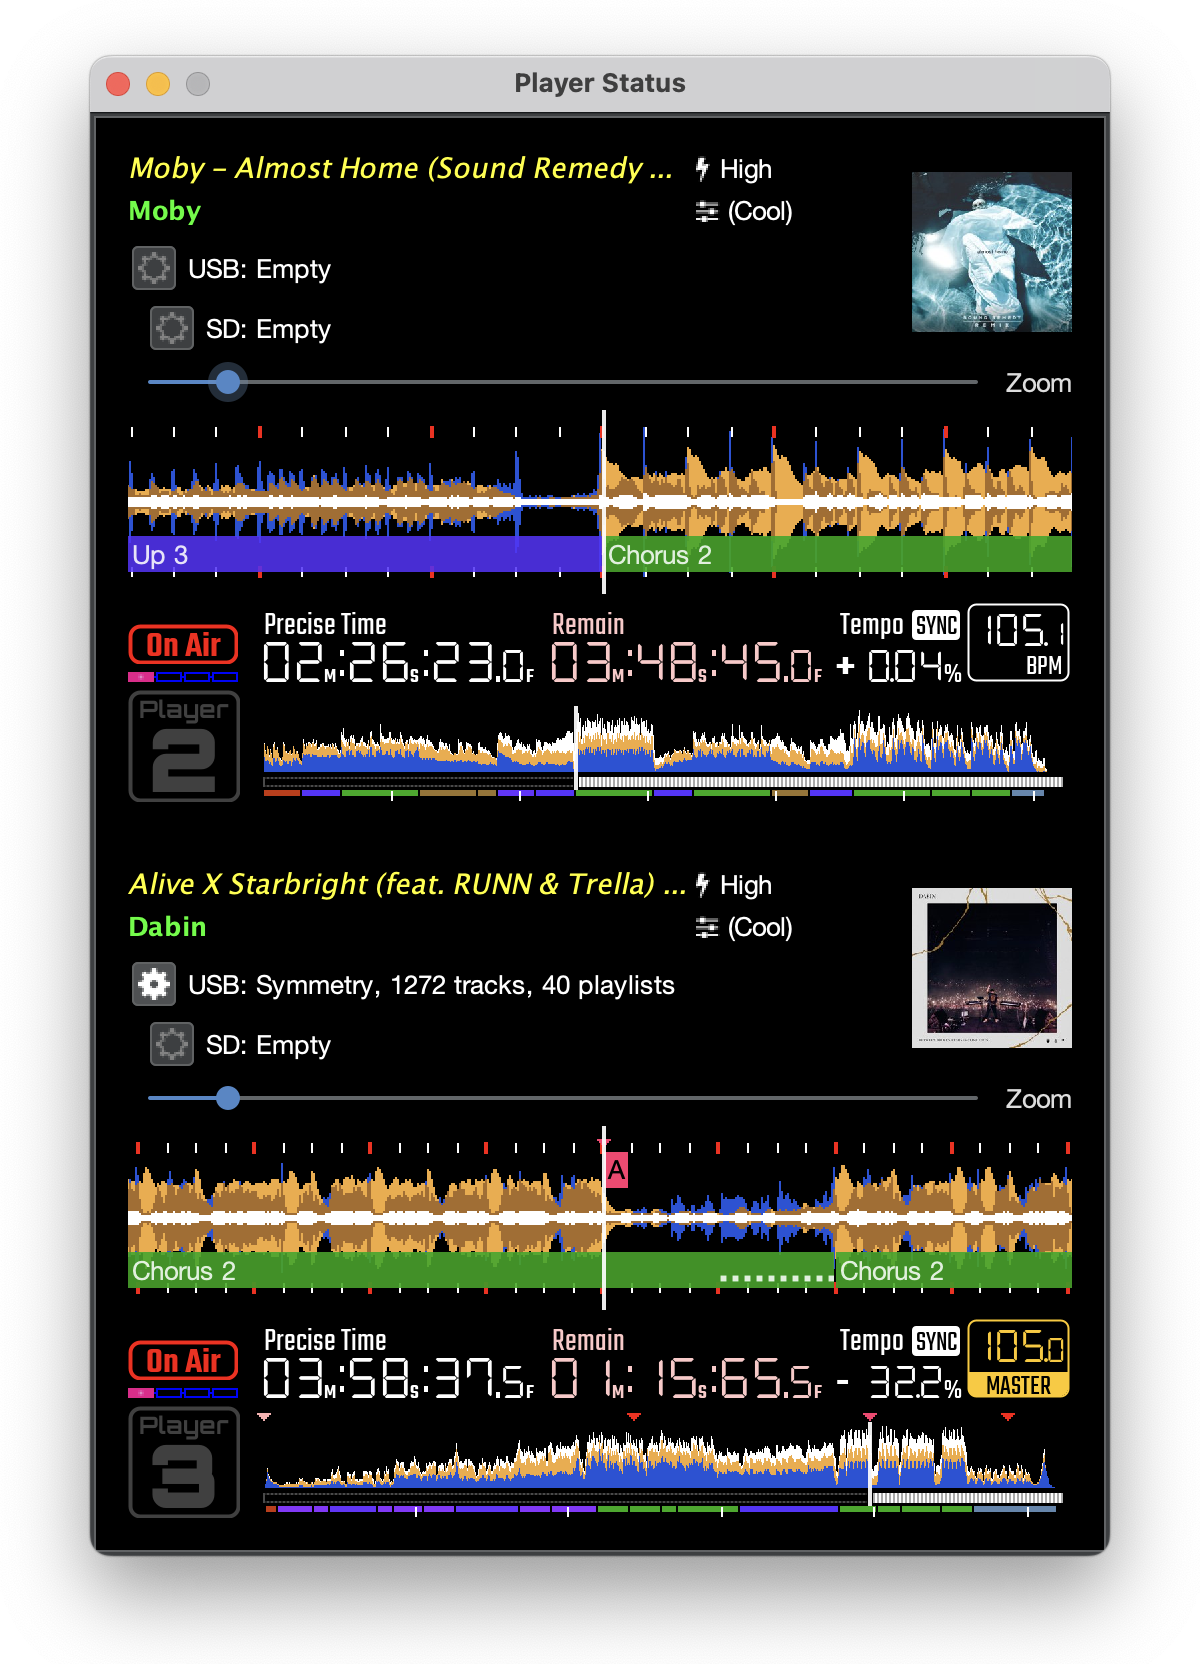
Player Status
If you want the Player Status window to open automatically, check the box next to Show Player Status? (This previously required adding code to the Came Online Expression.)
Carabiner (Ableton Link)
If you automatically want to synchronize with Ableton Link once Beat Link Trigger comes online, choose an option other than Off in the Carabiner Sync Mode menu. This will open the Carabiner Connection window and try to establish the mode you requested. See the mode descriptions in that window’s description for details about what the choices mean.
If you have chosen a compatible sync mode, and you want the Ableton Link session to be tied to the tempo and beats of the CDJs as soon as you go online, check the Sync Ableton Link? box. And if you want the sync to be performed at the level of entire measures, rather than individual beats, check the Sync at bar level? box. (All of these options made up the most complex Came Online expression example before the Settings window was added.)
Writing Playlists
If you want to automatically start writing to a playlist file as soon as you go online, you first need to choose a folder where they can be written, using the Choose button. With that done, and text entered in the Prefix text box, you can check the Write automatically? box to tell BLT to always start writing a playlist when it goes online.
If you want a single file to be used, with later runs appending to the same file, then check the Append to existing file? box.
Playlist file names will then be formed by adding .csv to the name entered in the Prefix text box in your chosen folder, and the file will just keep growing with each run of Beat Link Trigger.
If you want a separate file for each run of BLT, leave Append to existing file? unchecked.
In this state, if the playlist file already exists, a unique new filename will be chosen by combining the Prefix value, a timestamp, and the .csv extension.
OBS Overlays
If you want the OBS overlay server to automatically start once Beat Link Trigger comes online, check the box next to Run web server? (This also previously required Came Online expression code.)