Expressions
A great deal of the power of Beat Link Trigger is in what you can do with custom expressions. The user interface lets you configure triggers to send simple MIDI messages in response to basic state changes or when specific beats are reached in tracks or phrases, but with expressions you can write your own logic to determine when the trigger should be enabled, using all the information provided by the DJ Link protocol, and you can even send other kinds of messages locally or over the network to integrate with systems that do not respond to MIDI.
|
Expressions are written in Clojure, the same language that was used to write Beat Link Trigger. When you write one, it gets compiled to Java byte-code and loaded, essentially becoming part of Beat Link Trigger as if it had been there all along. So you have access to the full power of the language and Java environment, and can do anything you need to. But you will need to learn a little Clojure to do it. The official Learn Clojure page is a good starting point, and there are many Resources and Books if you decide you want to go deep. Maria is a fun, interactive online workbook that progressively introduces the language through exercises with instant feedback—and better support and guidance when errors happen than the language itself provides. It’s worth checking out. |
If you are working with the new Show interface, rather than the low-level Triggers that were first implemented, then the expressions you’ll be using are covered in later sections, but you should at least skim the Triggers expression explanations too, because they introduce some important concepts that are useful everywhere.
With Great Power comes Great Responsibility
| The code you write in expressions gets compiled into Beat Link Trigger in the same way as the program itself was written. This gives you great power, but it also means you can completely lock up the program if you change the wrong things or get stuck in an infinite loop. It’s important to start simple, and to keep in mind that your expressions run as part of processing network updates from players and mixers, so they need to finish fast. |
Beat Link Trigger tries to protect against many kinds of things that can go wrong in your expressions. If one throws an exception, it will be logged so you can view it in the log file, and that instance of running your expression will be abruptly cancelled, but the next expression or activity will get a chance to run.
The real problem is when your code does something that takes a long time, or even worse, gets stuck in an infinite loop. If that happens, nothing else that is supposed to respond to the event that caused your expression to run will get a chance to, and events can pile up behind your stuck expression, freezing user interface updates, and blocking the MIDI or other messages you are supposed to be sending. So watch for that, and remember which expressions you have changed recently if things go badly wrong.
If you legitimately need to do something in an expression that could take a long time, such as an HTTP request, or any other sort of round-trip network communication, you need to make it asynchronous by wrapping the potentially-slow operation in a Clojure (future …) block.
This will run in a separate thread, so it will not slow down the expression, or the delivery of events to other triggers, shows, cues, or the user interface.
The tricky part about using future to run your code asynchronously is when you need to do something with whatever answer you got back from your long-running operation.
You can’t just return it, like you would in a simple, direct expression, because the expression has already moved on, it did not wait for the answer.
The easiest solution is to have your asynchronous code inside the future block record the answer into an expression local or global, and then other expressions (or even future invocations of this expression) can check the local or global to see if the answer is ready, and use it when it is.
That is a quick operation.
So as long as your code works (even if it doesn’t yet do anything) while the answer is still missing, it can check for it without blocking other activity, and use the response as soon as it becomes available in the expression local or global.
| There is an example of this sort of background communication in the ShowXpress integration example, and if you have a situation where you think you might need one and would like help, ask in the Zulip stream, and perhaps we can turn your needs into a new example for future releases. |
Also, note that it is only sending two-way network communications that you really need to worry about. Sending MIDI messages and short one-way UDP messages (like OSC and some lighting controllers use) should be no problem without resorting to asynchronous code, and you will find examples of doing just that throughout this guide.
Editing Expressions
The expression you are first likely to want to use with low-level Triggers is the Enabled Filter, which is found in each trigger’s context menu. In fact, as soon as you set a trigger’s Enabled menu to Custom, Beat Link Trigger will pop open the editor for that expression for you, if you have not yet created it:
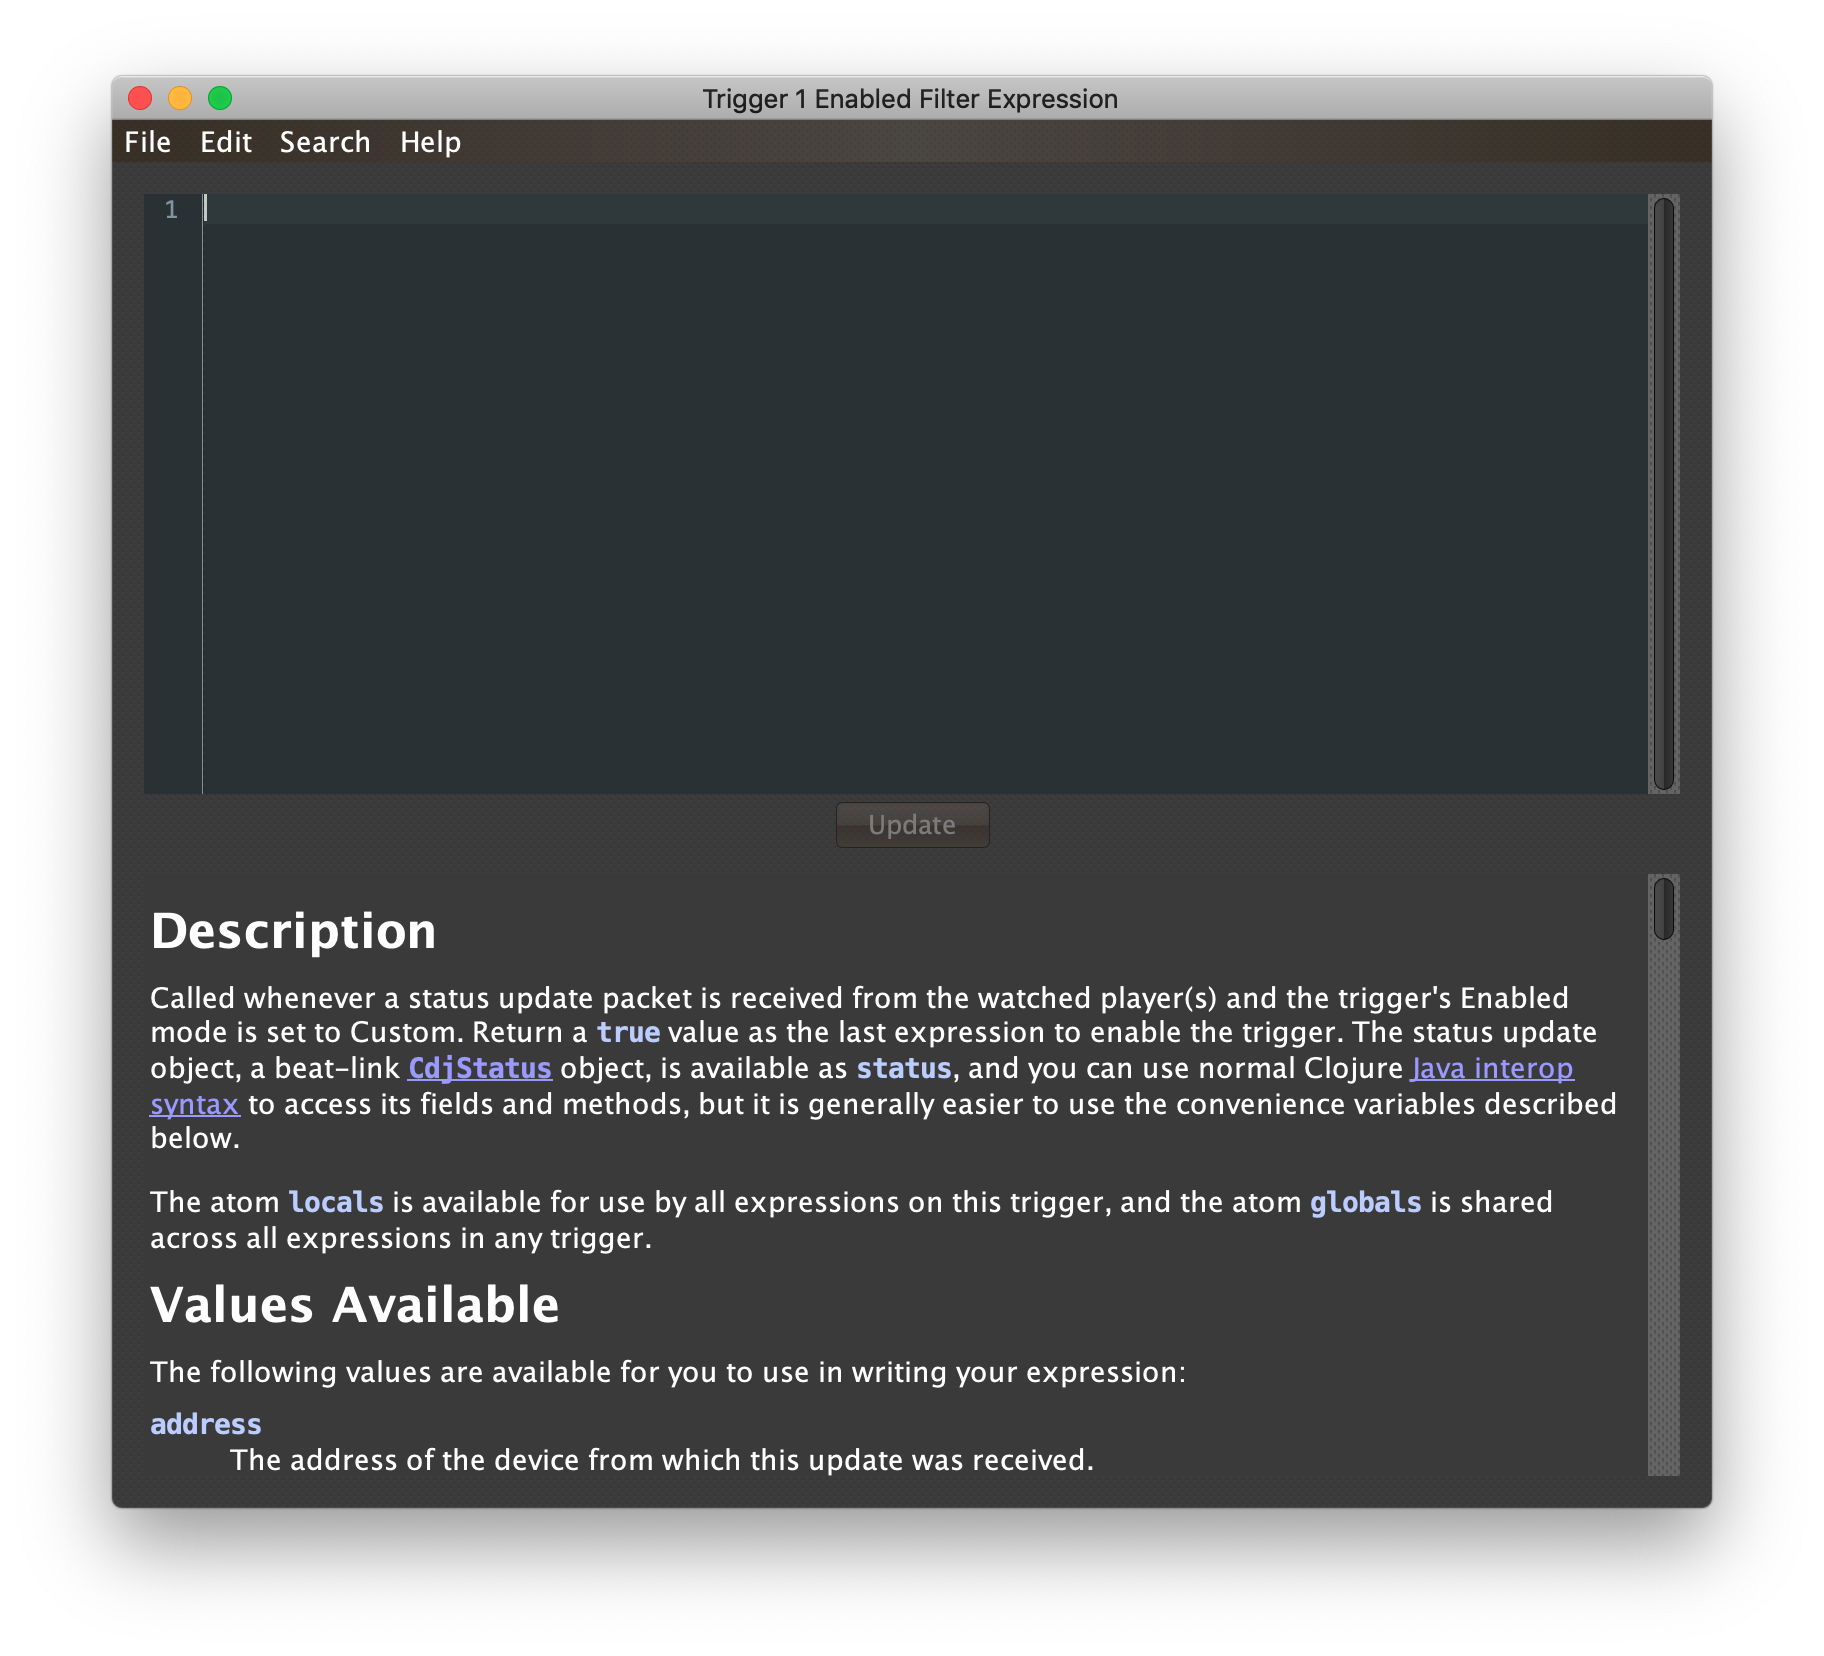
The editor window for each type of expression provides documentation about the purpose of the expression and guidance on how to write it. Most expression types have a variety of values that are available to help you in writing the expression, and those are described and explained in the help section as well.
Reading through the documentation, we see that the Enabled filter should return a true value to enable the filter, and has access to a lot of information about the watched player that it can use to make its decision.
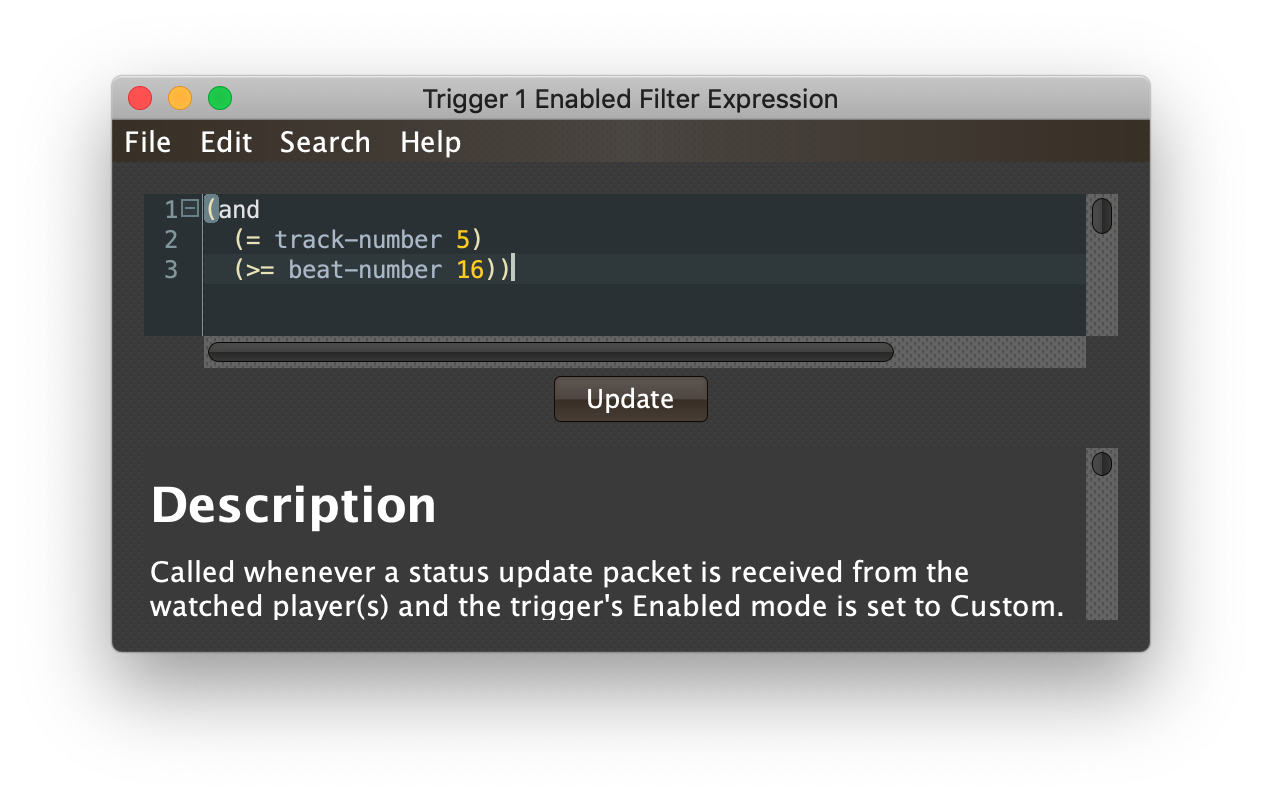
Suppose we want the trigger to be enabled when the player has track number 5 of a playlist or disc loaded, and has reached the fourth bar of music (which starts on beat 17, since there are four beats per bar, and we are assuming for simplicity the track starts with a downbeat on beat 1).
With the help of Learn Clojure and the help text in the editor window, we come up with the following expression:
(and
  (= track-number 5)
  (>= beat-number 16))
Try entering that as the Enabled Filter expression for your filter, set the Enabled menu to Custom, and watch the Trigger Status indicator as you load and play different tracks to confirm that it works!
Of course, if you want something to happen when a particular track reaches a particular beat, the Show interface is now a much easier and more powerful way to arrange that. Still, read on to keep learning the basic expression editing concepts.
|
As you use the editor, you will notice that it provides syntax coloring and parenthesis-matching help. But if you end up making a mistake in your expression, Beat Link Trigger will likely report a compilation error when you click Update, and you can check the log for a more detailed stack trace. You can try searching the web for information about the error, or looking in the Clojure documentation, but you can also ask for help in the Beat Link Trigger Zulip stream. If you are working with large expressions, you can focus on the part you are interested in by using the little - box that appears next to the line number of the first line of a multi-line expression. This allows you to collapse the entire expression, letting you see what comes on either side of it. Clicking the box again (which will show as a + sign now) will expand it again. If you hover the mouse over the + without clicking on it, you can also peek at the collapsed content as a tooltip. This feature can also be activated using the Folding submenu of the context menu, which appears when you right-click or control-click in the editor text area. And if you want to really get serious about learning Clojure and editing it in a powerful way, consider connecting an IDE. |
The Editor Menus
Beat Link Trigger now offers a menu bar inside the expression editor to access more powerful editing features. The File menu makes it easier to use a favorite (or more full-featured) external editor by letting you save your expression to a text file for that editor to work with, and load the results when you are done, or insert another file at the current insertion point.
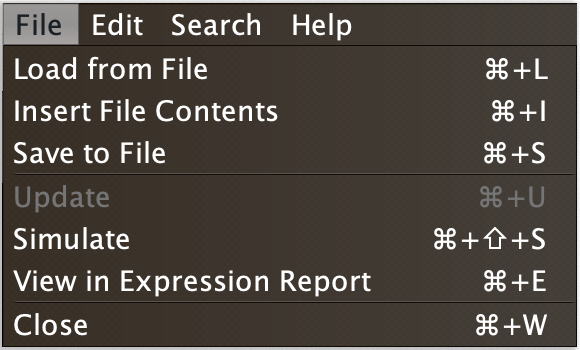
It also lets you update the expression when you have changed it, compiling and loading the new version, or close the editor without saving your changes.
lets you test the effect of the current text in the editor window without updating it, by pretending that the expression is being run in a plausible show context.
|
This is slightly different from the Simulate submenu in the context menu that opened the editor, because that outer submenu uses the last-saved version of the expression, not the current contents of the editor. This Simulate option will only be available for expressions that can be simulated—that is, expressions which do appear in the outer Simulate submenu. (Keep in mind that even when you can simulate it, if you have written an expression that relies on deeper interaction with show internals or the Pro DJ Link environment, it can’t be practically simulated in this way: you’ll need to hook up actual player hardware and create the situation that the expression responds to. But for many expressions this is a valuable testing and troubleshooting tool.) |
Of course if there are any errors in the syntax or semantics of your expression, they will be revealed in the attempt to simulate it as well.
Finally, tells your system browser to open the expressions report for the Triggers or Show window and scroll it to the section that holds this expression. This allows you to compare it to the related expressions (and copy in relevant parts if they are helpful), or simulate more than one in sequence to test how they will interact in a real performance.
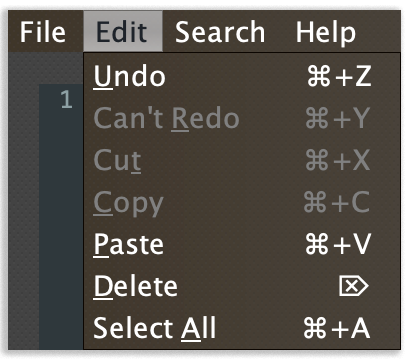
The Edit menu gives you access to the standard editing capabilities that were formerly available in the context menu (which you can bring up by right-clicking or control-clicking anywhere inside the editor text area), and shows you their keyboard equivalents. You might not even have known these features were available, although you were probably already reflexively using the platform-standard editing keys:
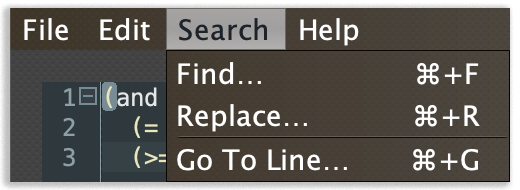
The Search menu opens up special panes below the editor text area that allow you to find and replace text, with control over case sensitivity, whole-word matching, and the option to use regular expressions. It also allows you to jump to a particular line by number.

Finally, the Help menu is the same one available in most other windows, giving you access to this guide along with other helpful tools and information.
Shared Functions
Once you start writing more complex expressions, you may find yourself repeating common pieces of code over and over again in multiple expressions.
The best way to deal with that is to pull out the repetitive part and write it as a function, which can then be called from any expression that wants to use it.
In Clojure, you use defn to define a function, and choosing brings up an editor window that is where you should organize all the shared functions you want your Triggers expressions to use.
The Shared Functions will be loaded before any of your expressions are compiled.
|
If you are going to be using functions in Show expressions, define them using in the Show window instead.
Show expressions are compiled into a separate namespace, unique to each show, to avoid collisions between function and variable names.
Expressions for the Triggers window are compiled into the If you need the same functions in both your Show and Triggers expressions, put copies in both places. (This was even necessary before the functions were given separate namespaces, to ensure the Triggers expressions would work even if the Show was never opened.) Having multiple copies of a function is harmless, though you may want to make sure you have exactly the same definition in both places, or you might confuse yourself! |
For a detailed (and amusing) look at defining and using shared functions in a show, check out the Break Buddy integration example.