Pangolin BEYOND Essentials
To use the power of the PangoTalk UDP server, you need a BEYOND Advanced license. But even with just BEYOND Essentials, you can use MIDI mapping to achieve basic tempo synchronization and cue triggering with Beat Link Trigger. Here are some pointers about how to do that.
MIDI and Windows
Because BEYOND Essentials runs on Windows, which has no built-in support for routing MIDI between applications on the same machine or over the network, you need to add some other software to allow Beat Link Trigger to send MIDI to it.
- Single Machine
-
If you are running both programs on the same machine, you can use LoopBe1 to create a virtual MIDI port that Beat Link Trigger can use to send messages to BEYOND Essentials.
- Networked Machines
-
If you want to run Beat Link Trigger on a different machine than BEYOND Essentials, then you can use rtpMIDI to send MIDI messages between them. (If both machines are Windows, you need to install rtpMIDI on each one. If you are running Beat Link Trigger on a Mac, it already has native Core MIDI network support, which rtpMIDI is designed to be compatible with.)
See the documentation of LoopBe1 and/or rtpMIDI for instructions on how to install, configure, and use them.
Connecting to BEYOND Essentials
Once the virtual or network MIDI port is available on the machine that BEYOND is running on, you need to connect it as one of the MIDI devices that BEYOND is watching. Open up the MIDI Devices settings by choosing Here, the new LoopBe virtual port has been chosen for input and output as Device 1 within Beyond:
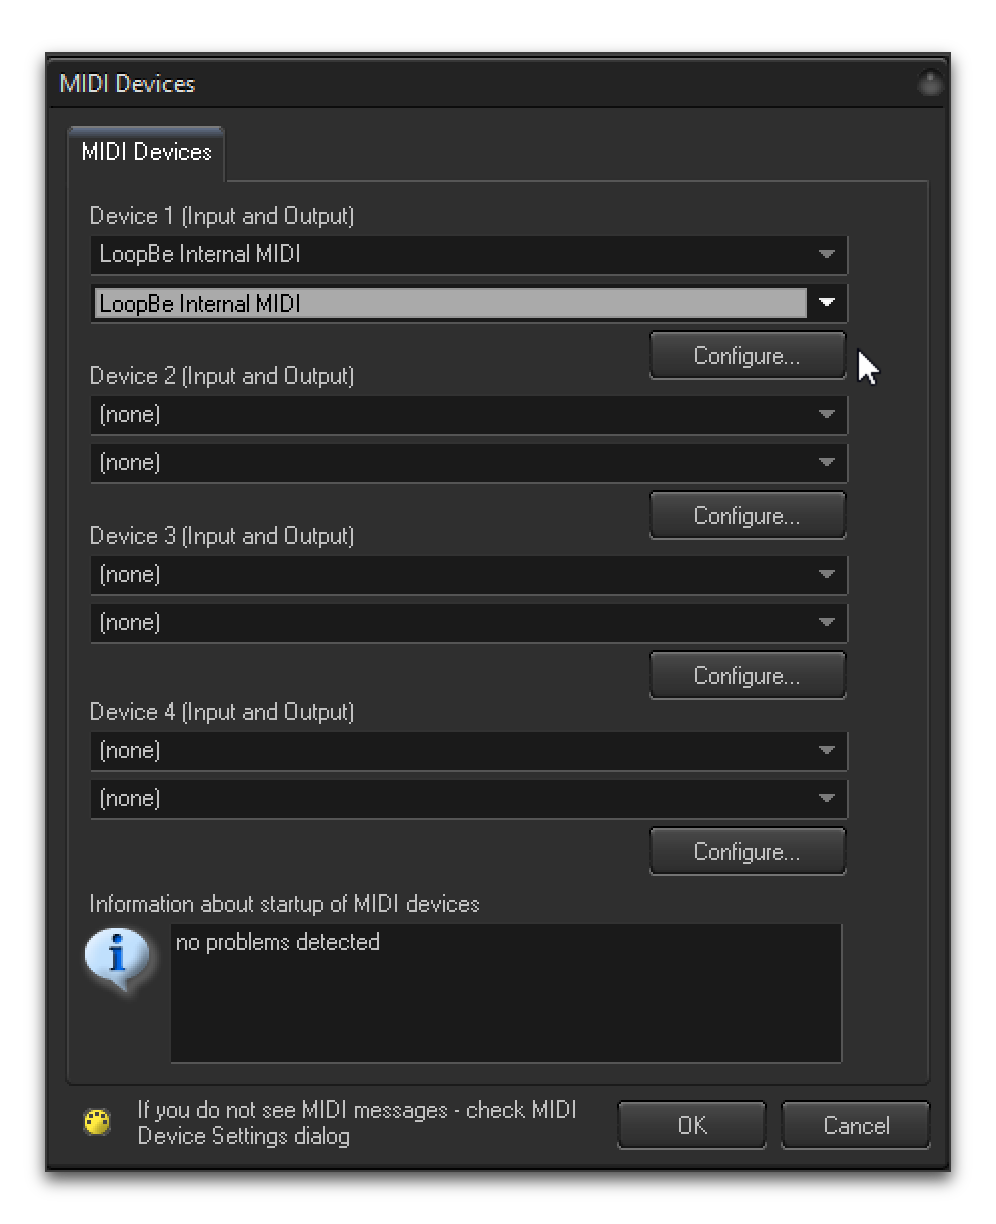
Click OK and the device will be available as a source of MIDI messages.
Tempo to BEYOND via MIDI
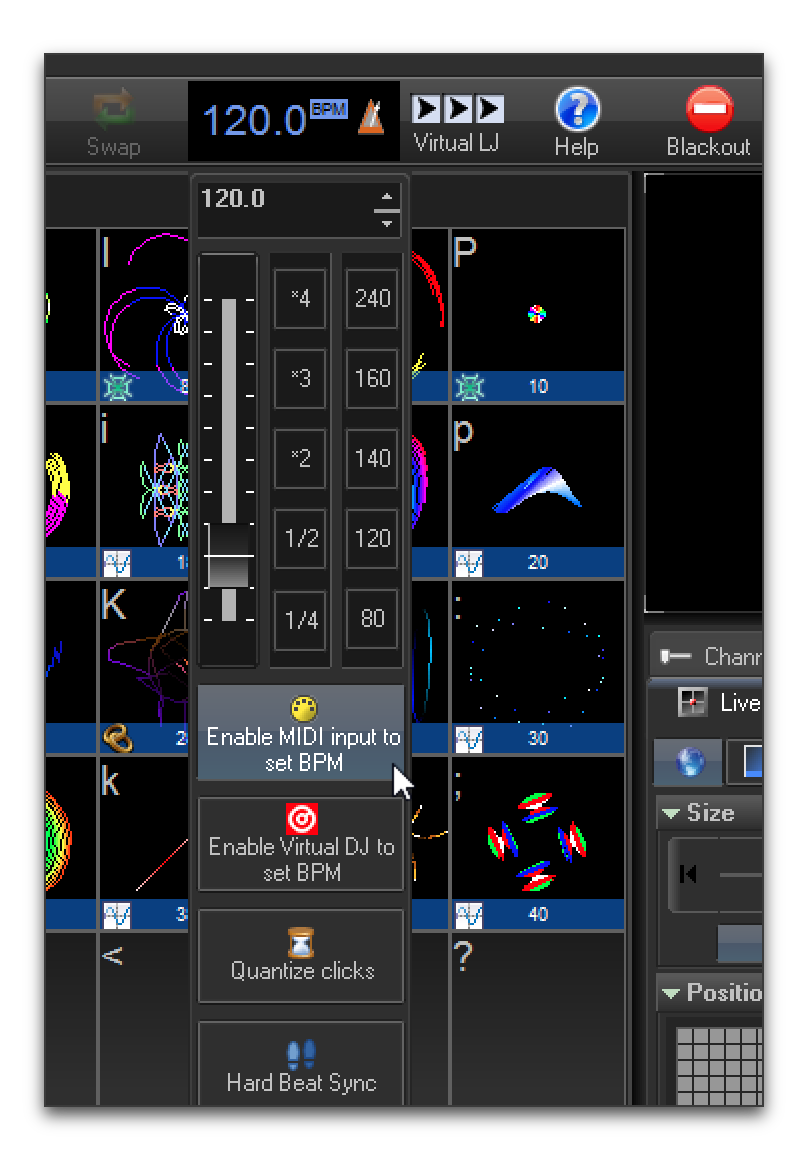
To enable Beat Link Trigger to adjust BEYOND’s tempo using MIDI Clock messages, right-click on the metronome at the top of the BEYOND window, and click the Enable MIDI input to set BPM button in the contextual menu that appears:
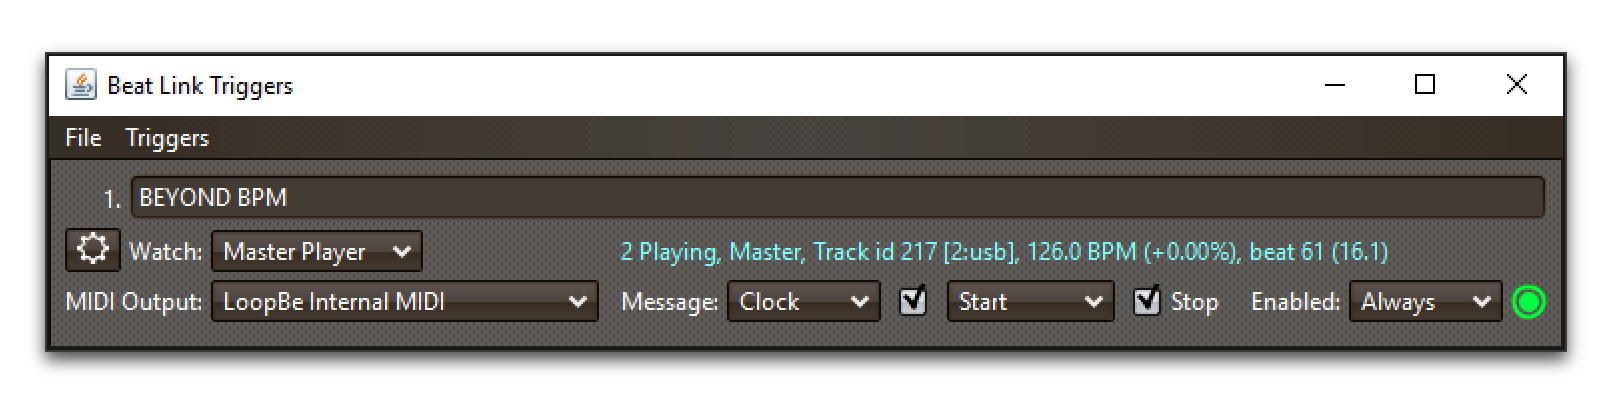
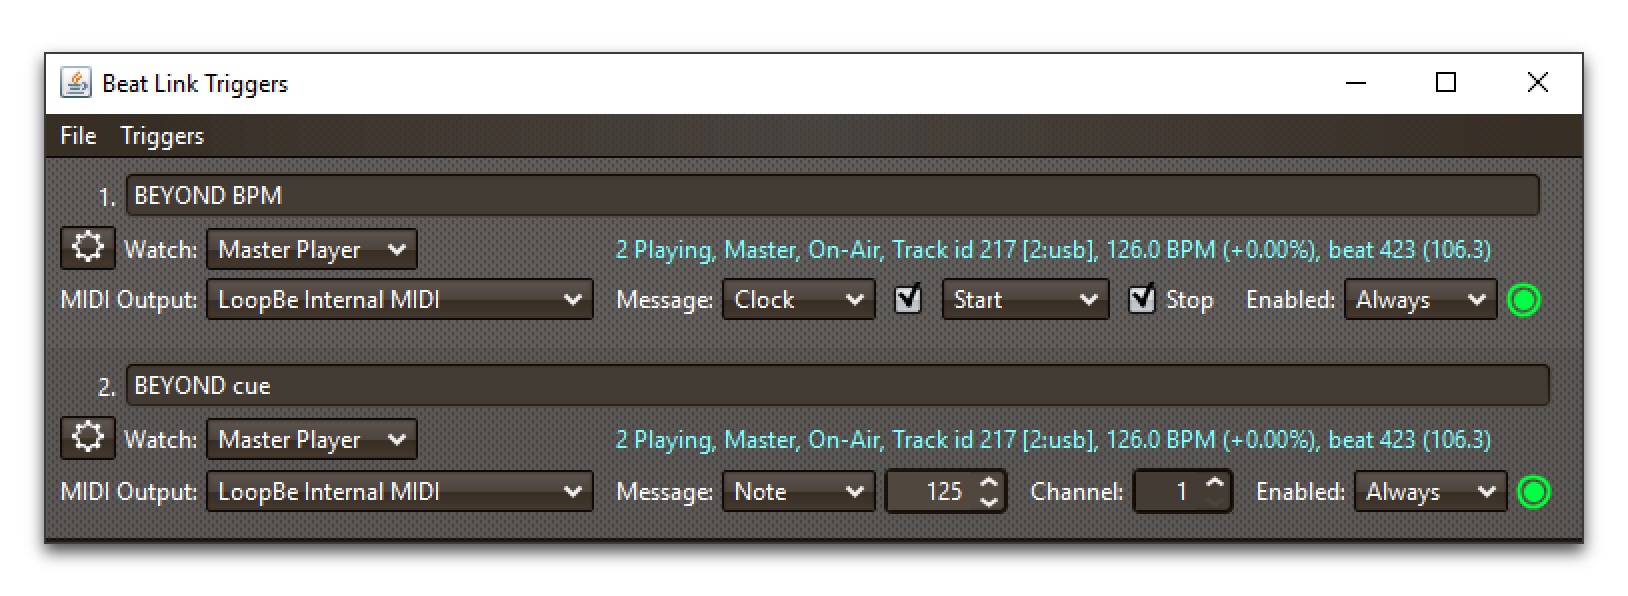
Once that is done, you can configure a Trigger in Beat Link Trigger to send MIDI output to the device that BEYOND is listening to, and set the Message menu to Clock, so it will send MIDI Clock messages to communicate the current BPM:
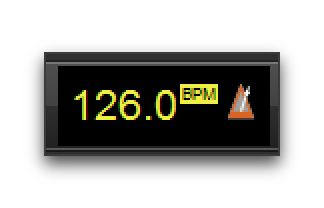 Once that trigger activates, the BPM display in BEYOND will turn yellow and will track the tempo of the track that activated the trigger, although not quite as precisely as it can using the PangoTalk server, since MIDI clock is a less direct way of communicating it.
If you don’t want Beat Link Trigger to send Start or Stop messages when the trigger activates and deactivates, you can uncheck the corresponding checkboxes in the trigger row. You may want to experiment to see how BEYOND responds to them, or ask an expert in BEYOND MIDI integration.
Triggering Laser Cues via MIDI
Once you have the MIDI connection established, getting cues to run when triggers or show cues are active is fairly straightforward. You just have to assign each trigger or cue a unique MIDI Note or Controller number, and then map that to the appropriate cue cell in BEYOND.
| Although this example demonstrates using triggers in the Triggers window, now that Beat Link Trigger has Shows, you will likely want to use their Cues instead. The same techniques work there. |
The screen capture below shows the addition of a basic MIDI Note trigger to the clock trigger from the previous example. This new trigger will send a MIDI Note On message for note 125 on channel 1 when the trigger activates, and the corresponding Note Off message when it deactivates:
To tie that to a cue cell in BEYOND, choose , picking the name of the device that you connected in order to receive MIDI messages from Beat Link Trigger:
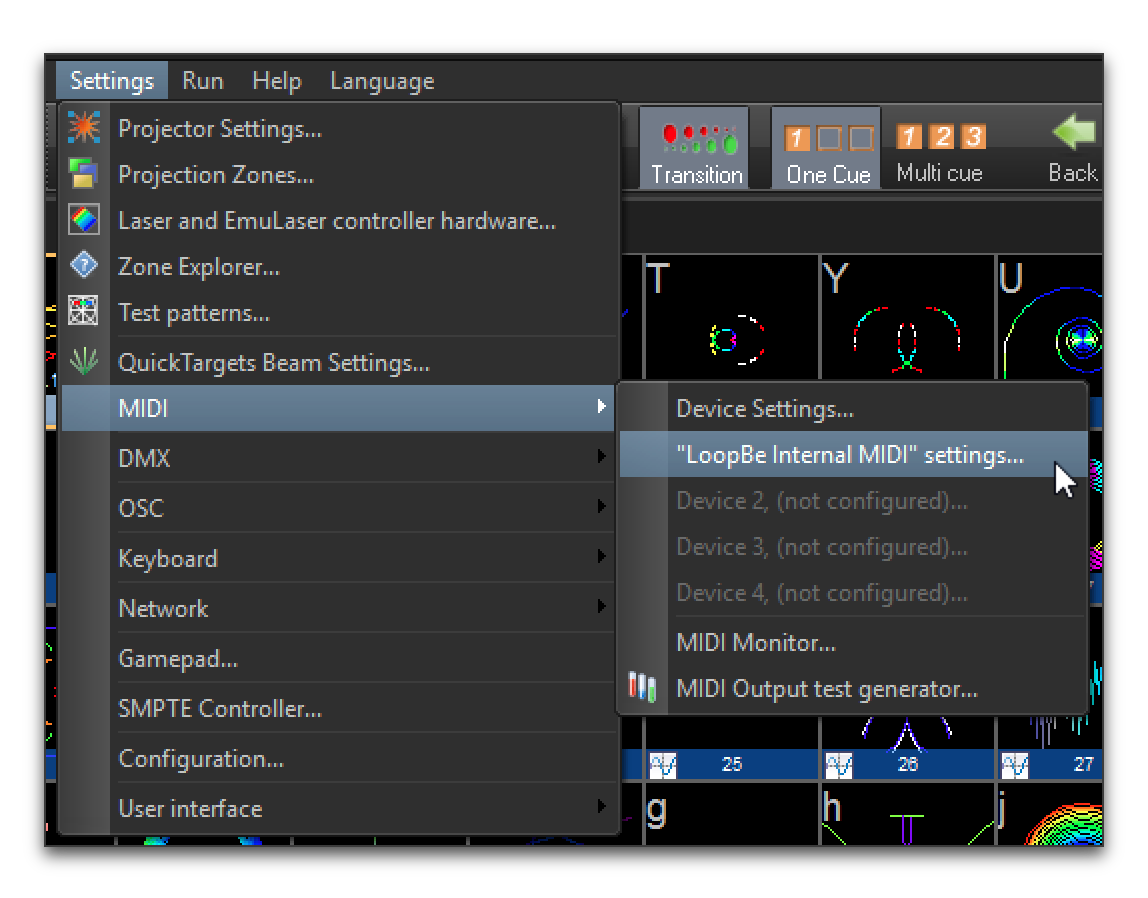
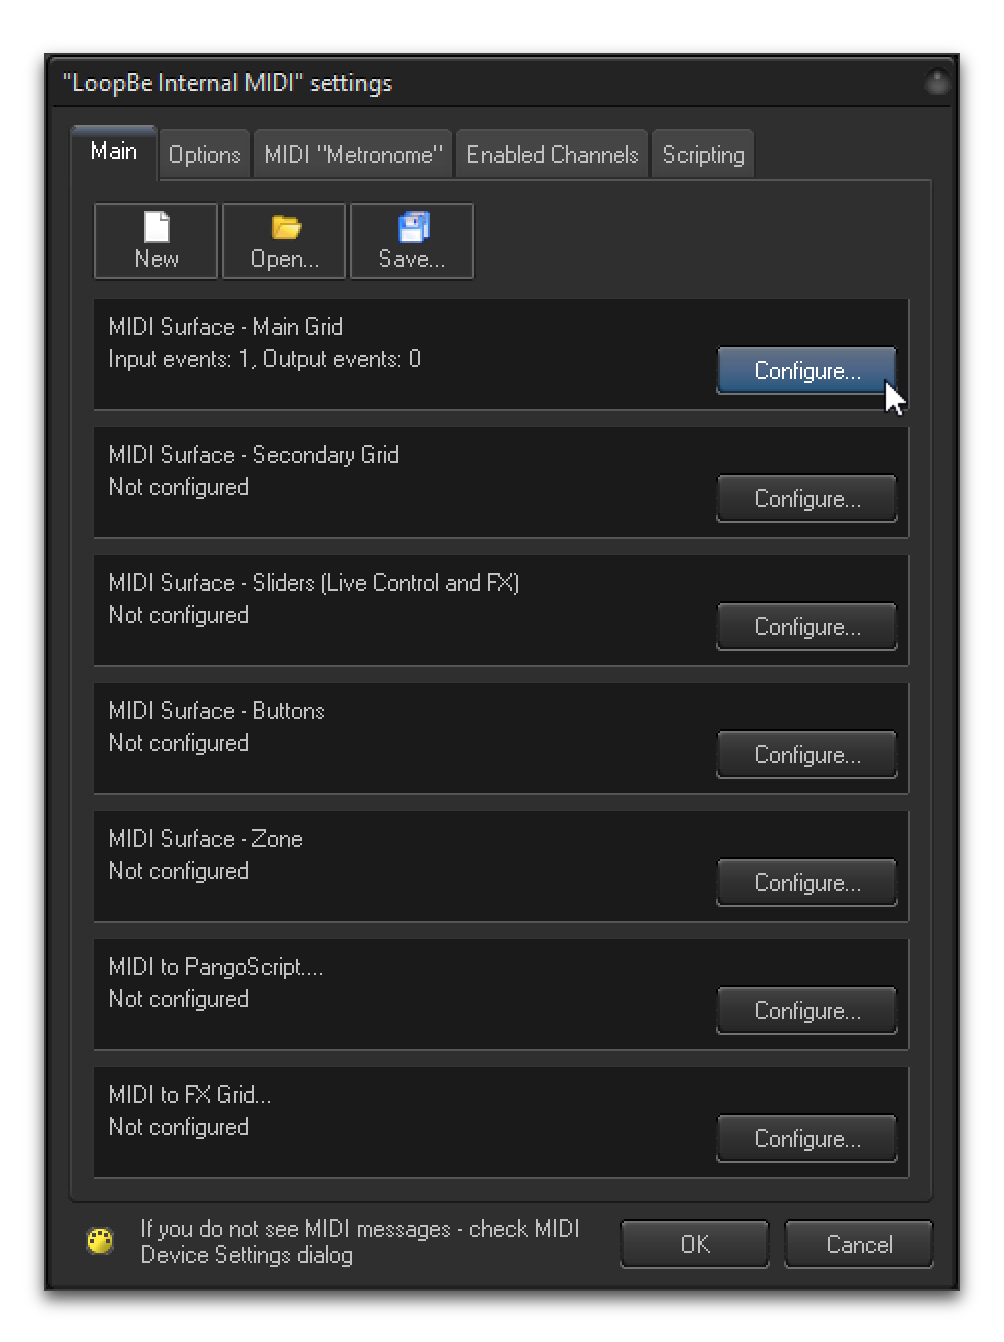
That will open a window that gives you access to a great many MIDI mapping options, allowing you to cause BEYOND to react to incoming MIDI events in different ways. For much more information about it, see the BEYOND MIDI Settings manual section, accessible through . In this example we’ll just take a quick look at mapping the first cue cell to respond to the Beat Link Trigger we have just created. To do that, click the Configure… button for the Main Grid MIDI surface:
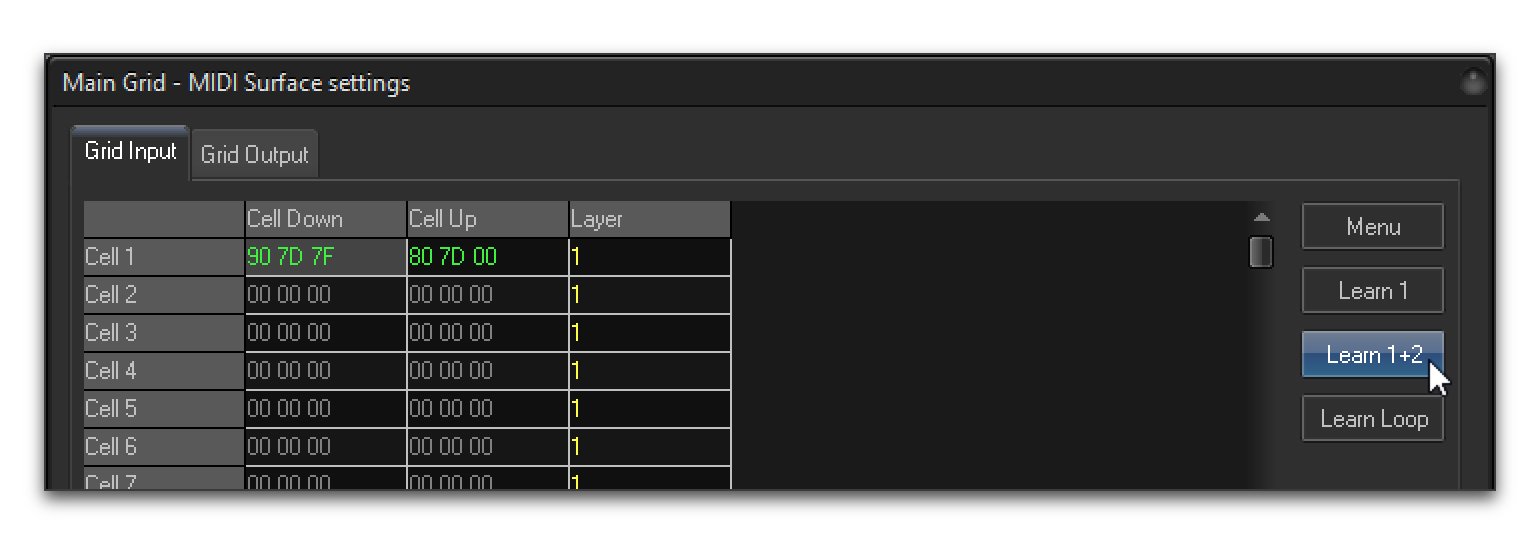
This section allows you to set the MIDI messages which BEYOND will interpret as a mouse down or mouse up event in each of the cue cells.
If you happen to know that the MIDI message we chose above corresponds to the hexadecimal numbers 90 7d 7f for the Note 125 On (with velocity 127) and 80 7d 00 for the Note 125 Off, you could double-click in those cells and enter the values directly.
Far more likely, you will select the Cell Down box for the cell you want the trigger to affect, then click the Learn 1+2 button, and while BEYOND is in Learn mode, activate and deactivate the trigger in Beat Link Trigger.
The Learn 1+2 command tells BEYOND to watch for the next two MIDI events and enter them into the grid cells for you:
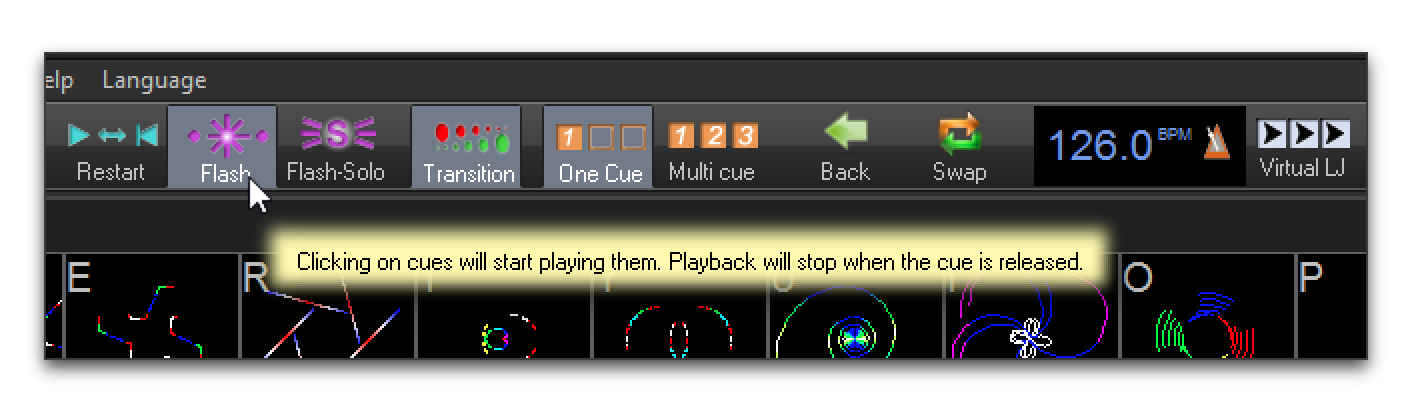
Once you have that mapping set up, whenever Beat Link Trigger reports that the trigger is activated, BEYOND will act as though you have clicked the mouse in the first cue cell, and when the trigger is deactivated, BEYOND will act as though you have released the mouse. In order to have cues end when triggers deactivate, you will want to put BEYOND into Flash mode:
Alternately, if you want to leave it in the default Toggle mode, you could use a custom Deactivation Expression in Beat Link Trigger to send another Note On message when the trigger deactivates.
If you just jumped to this section to get a look at how to get BEYOND to respond to CDJs, and you think it will be useful, you will want to go back and read this entire user guide (especially about Shows) to get a better understanding of how to make your triggers and cues activate for just the portions of the tracks or phrase types that you want them to. And again, this barely scratches the surface of MIDI mapping in BEYOND; see the BEYOND documentation and Pangolin forums for more information about that.