Extended On-Air for DJM-V10
An interesting question from DrFrankenspine in the project Zulip discussion community led to some cool developments. He has a custom studio setup for his mixing live streams, and wanted to automate highlighting which gear was currently audible in the mix, by sending MIDI or OSC commands to his lighting controller. This is already easy to support for CDJs, because of the Channels On-Air feature supported by DJM mixers. But he has channels connected to turntables and Eurorack gear, for which there is no On-Air support.
After a bunch of discussion and brainstorming, I decided the way to handle this would be to use MIDI to track the state of the mixer, much as we do in the Xone:96 mixer integration example, and build a completely self-contained on-air tracker that also takes into account the input selectors on each of the mixer channels. In this case, beyond sending out channels-on-air packets to the DJ Link network, our code would directly generate configurable MIDI messages to notify the lighting controller of the big-picture state of all the devices that might be connected to the mixer.
In this case, there is a great deal of code that I wrote for the integration example, so I don’t plan to show and explain it all here unless someone specifically requests that. I will instead provide a walk-through of how to use the user interface provided by the show file, which you can download and open whenever you want to use it.
| Because this integration requires MIDI messages from the mixer to detemine a richer notion of which channels are on the air, you will need to connect a USB cable from the mixer to the computer on which BLT is running, and turn on MIDI by activating the On button below the USB/MIDI ports. If the mixer is not connected this way, the show will display an error dialog when you go online, explaining that its features are disabled because the mixer could not be found. |
DJM-V10 Interface
When you have the show open, connect the mixer to the computer running BLT via USB, and take BLT online, you will see a user interface like this:
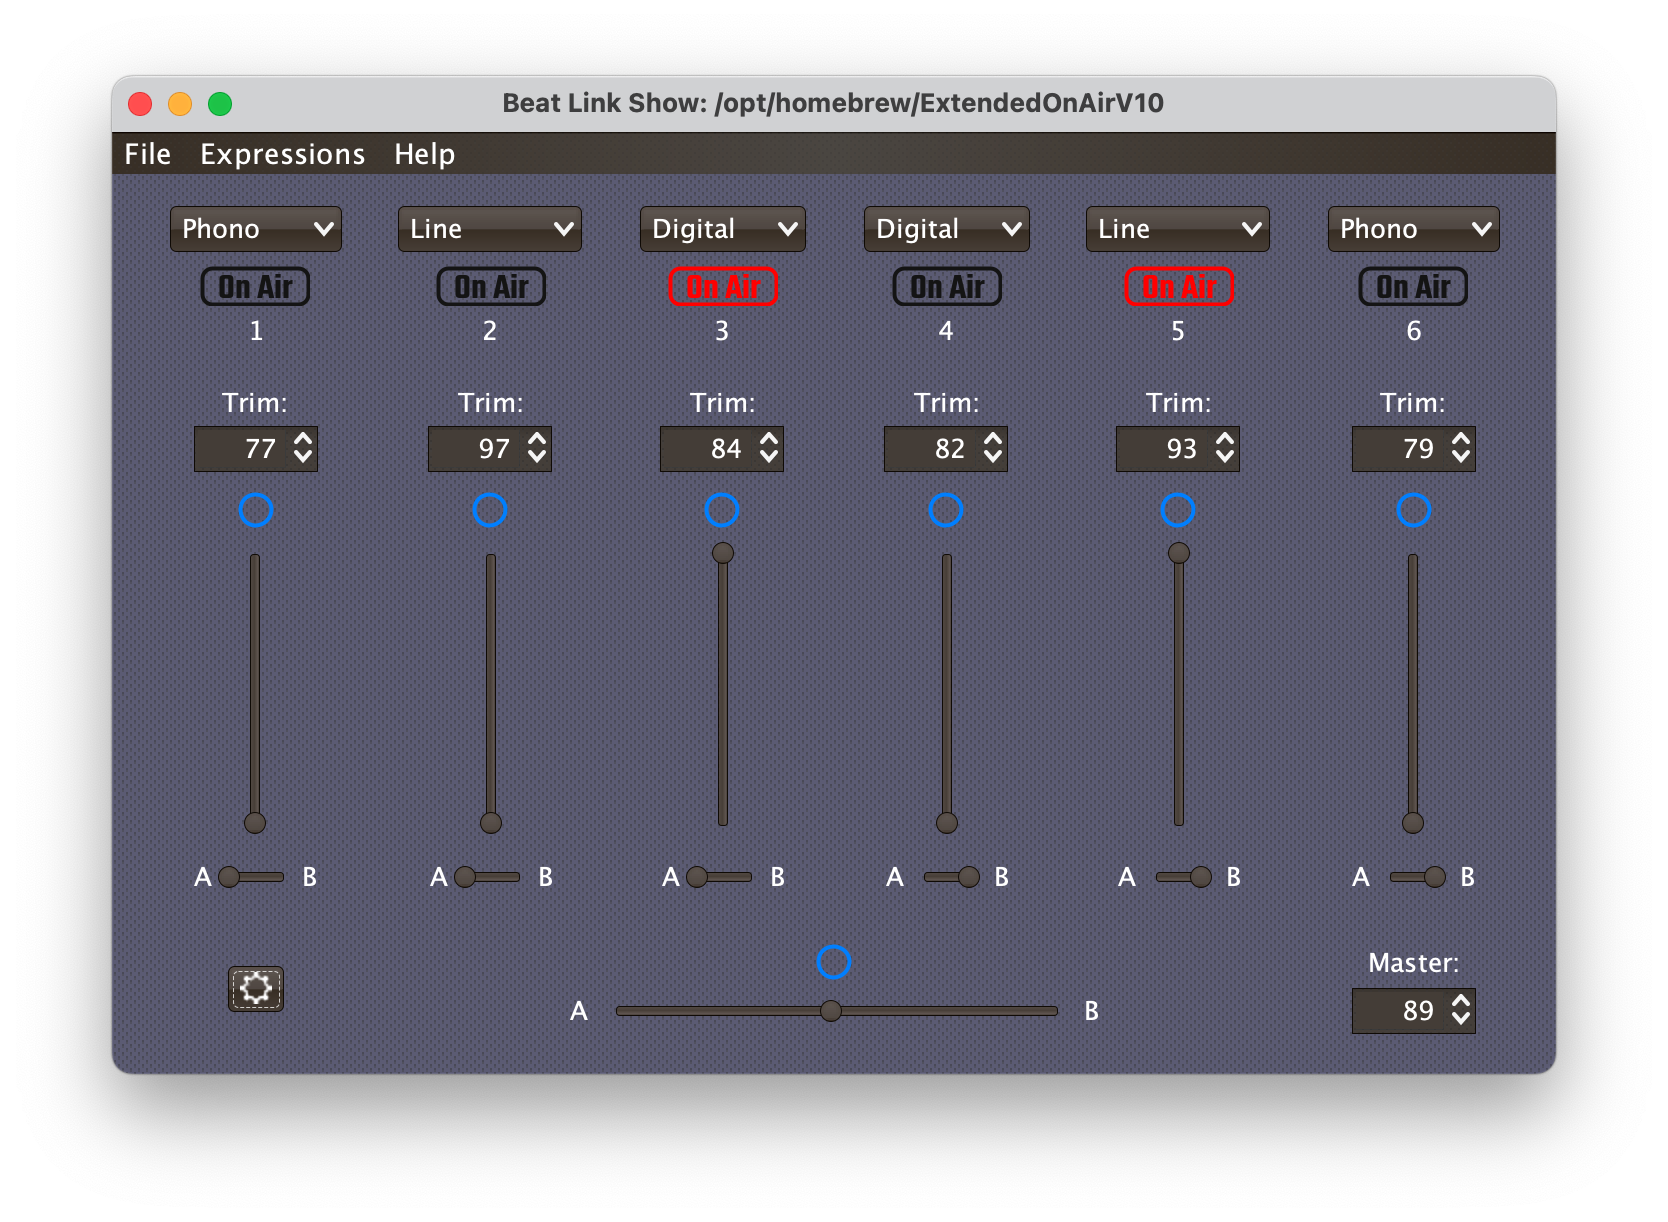
The dropdowns along the top show the current state of the input selectors for each channel. As with all MIDI integrations like this, you will likely need to toggle each of the selectors once to let BLT know what their current state actually is. But when you close the show, the current state is saved, so as long as you haven’t reconfigured the mixer with the show closed, it will stay correct.
Similarly, the Trim spinners show the current positions of each channel’s Trim knob, just below the input selector. Again, you will need to initially twiddle these for BLT to be able to pick up the knobs’ actual positions.
The long vertical sliders represent the current channel fader positions, which you will also need to initially move for BLT to be informed of their actual positions. The small horizontal sliders beneath them show the state of the crossfader A/Thru/B assignment switch below each channel fader. If these are inaccurate, move them on the mixer or in the UI until they align.
Of course, the large horizontal slider tracks the cross-fader. Move that if needed for BLT to pick up its current position. And the Master spinner tracks the Master Level knob to at the top of the mixer just to the right of the channels. Again, tweak this so BLT can tell its actual setting.
DJM-V10-LF Interface
If you actually have the long-fader version of the mixer, you can adjust the user interface to reflect that by clicking in the gear menu at the bottom left of the UI, and choosing in the popup menu. That will change the user interface to reflect the actual mixer controls:
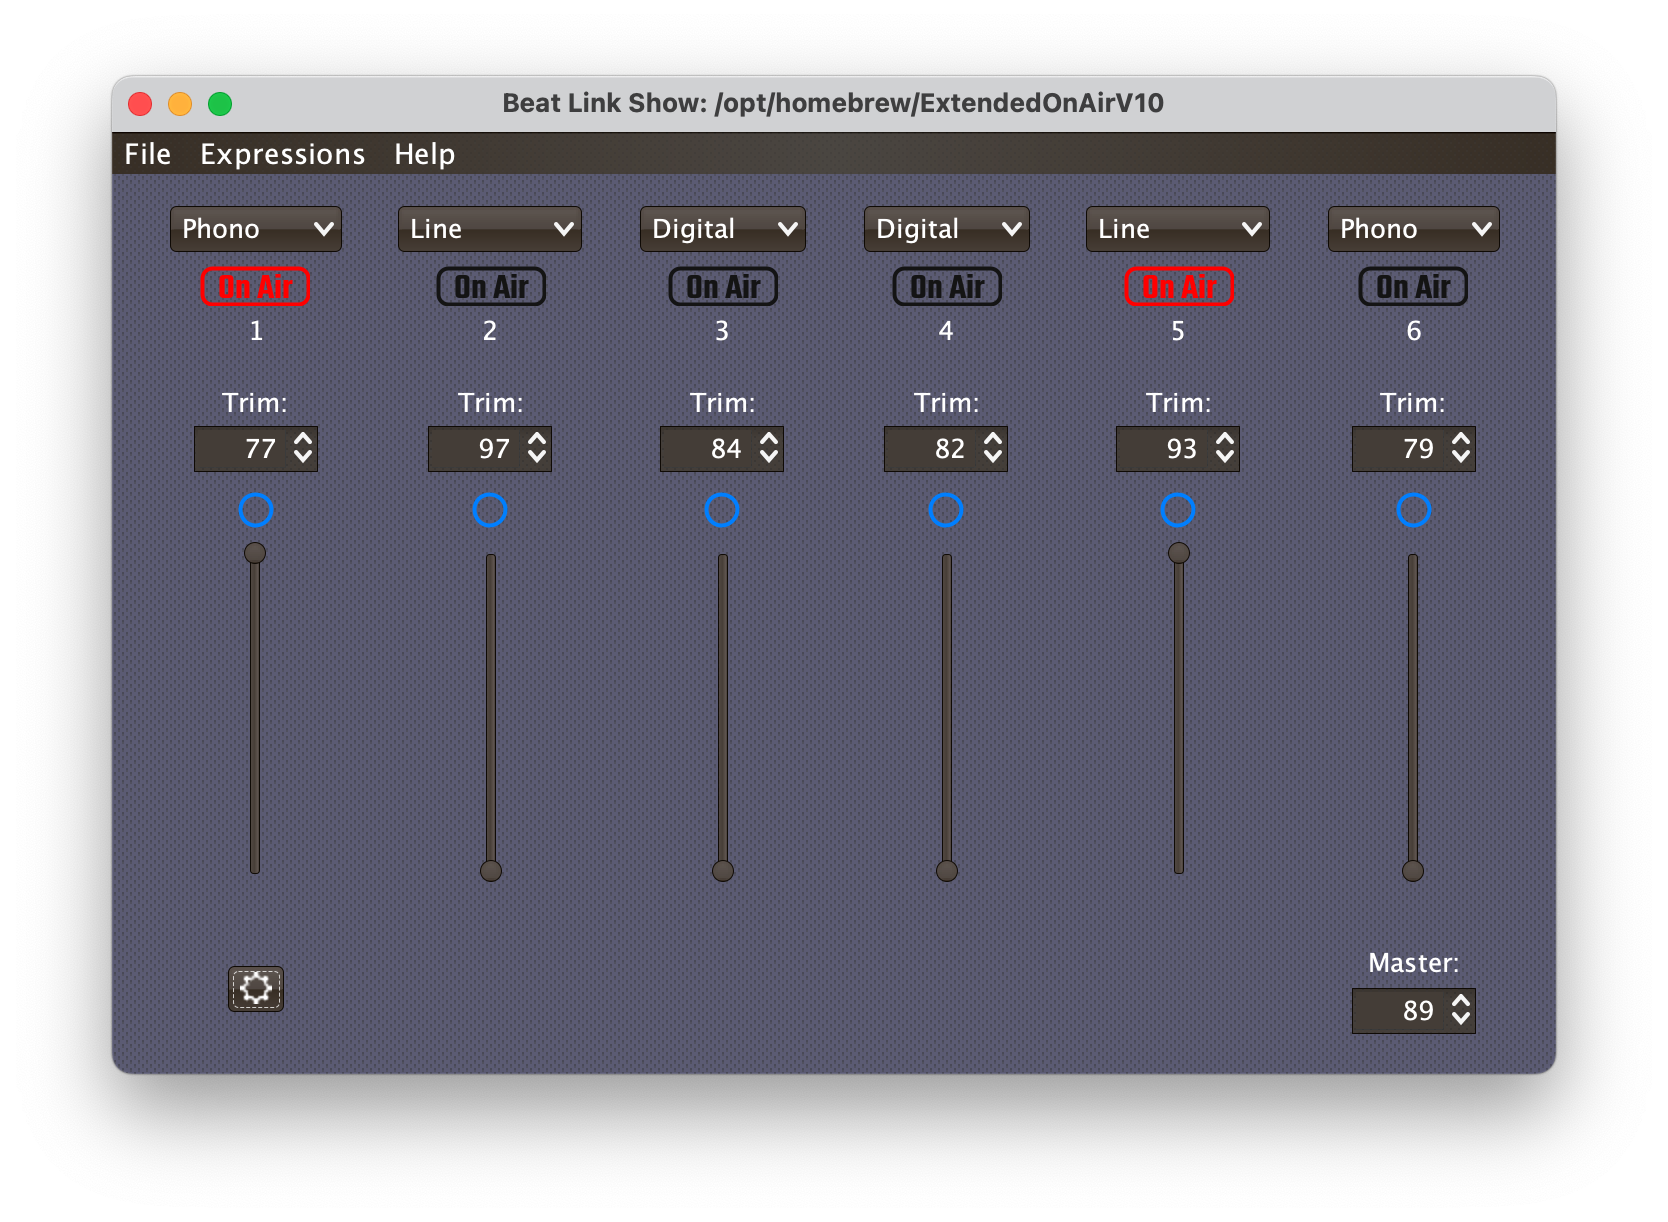
This mixer has longer channel faders, and no cross-fader, so it has no crossfader assignment switches either. As above, when you first set up the show, you will need to twiddle the knobs and faders for BLT to be able to learn their current positions.
Message Configuration
Once the show is tracking your mixer properly, you can set up the MIDI messages you want to send when devices you have connected to it go on or off the air (in other words when they start and stop being audible in the mix). To do that, click on the gear menu at the bottom left, and choose Configure Messages. This opens up a large window where you can assign a MIDI message to every combination of channel, input selector, and on or off-air state:
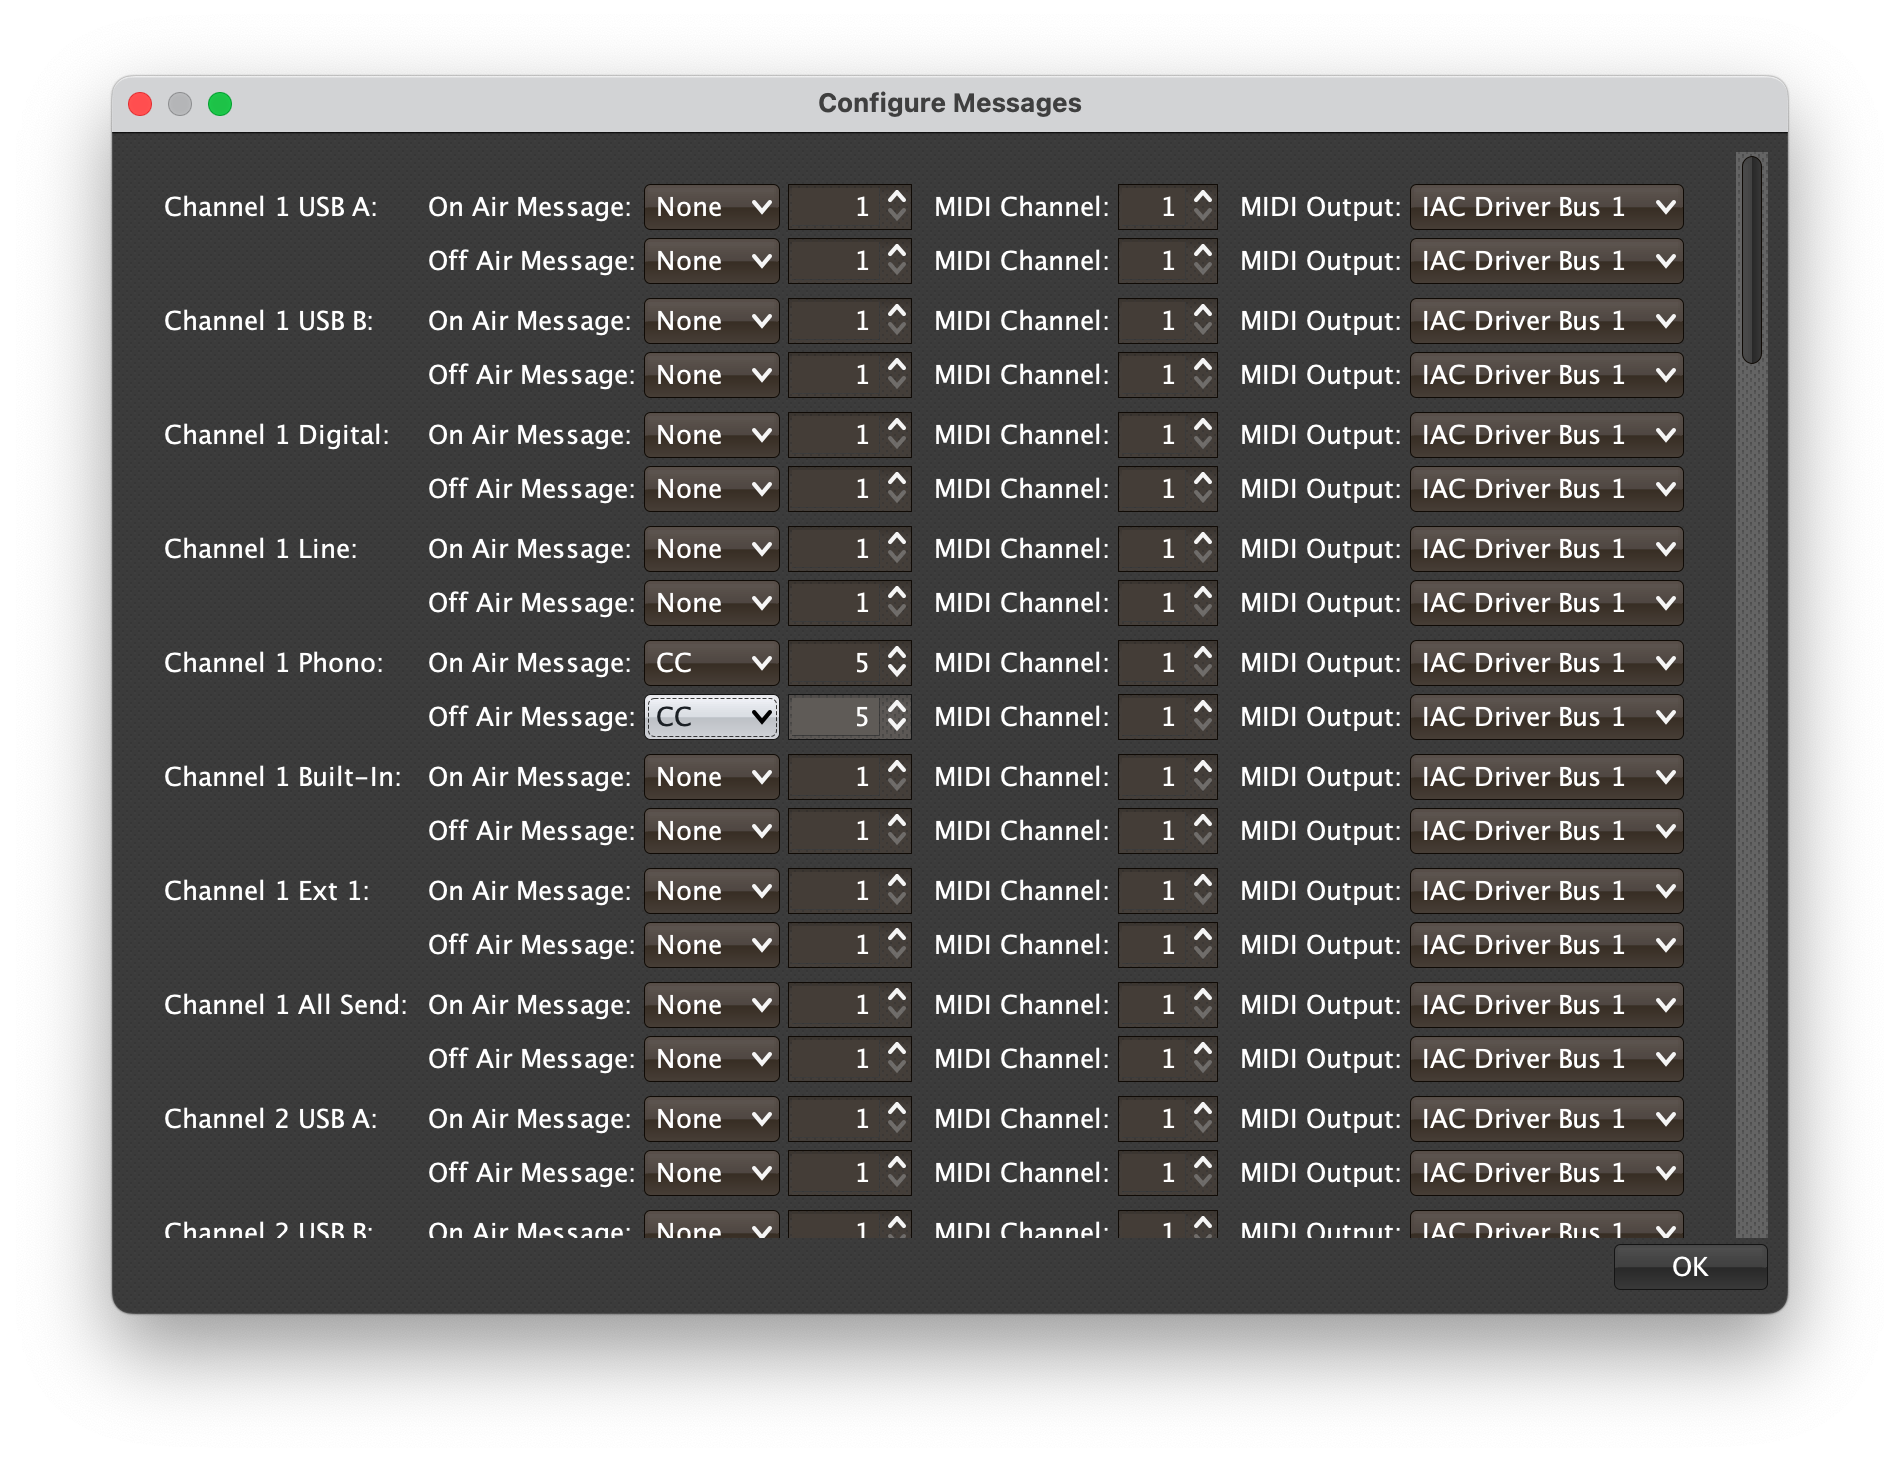
For any device that you want managed this way, find the rows corresponding to its mixer channel number and channel input selector position, and select whether you want to send a Note or Control Change (CC) message when it goes on and/or off-air, the note or controller number you want sent, and the MIDI channel and MIDI Output you want it sent on.
Once all the rows you want to use are set up the way you need, click OK to dismiss the window. The settings you choose will be saved within the show when you save or close it.