Triggers
Triggers were the first mechanism that existed for building integrations in Beat Link Trigger, and the Triggers window is still the primary one that opens when the program is first launched. Triggers watch for specific activity on one or more CDJs, and send things like MIDI or OSC messages in response. They can recognize tracks and synchronize external systems to them using MIDI clock or Ableton Link.
Overview
Each row in the Trigger window defines a single trigger, which watches a player or category of players, and can be configured to send different messages in response to what the player is doing.
If this is the first time you have opened Beat Link Trigger, you will see just one trigger containing default options.
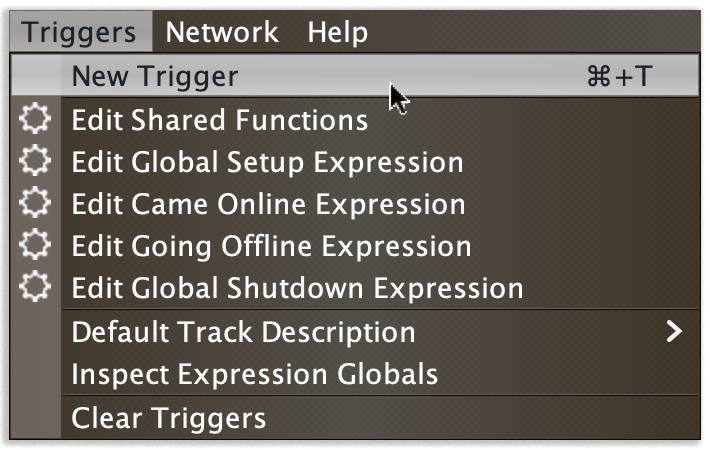
To create additional triggers you can choose , or type ⌘+T (on the Mac) or Ctrl+T (on other platforms). You can get back to this default state at any time by choosing .
| Triggers allow you to build all kinds of integrations with your players, at a very low level. For the common case of wanting to make something happen when a particular part of a specific track is played, the new Show Interface added in version 0.5 is much easier and more convenient to use, so you may want to start with that! And for an even faster way to get started, you may wan to explore the integration example that shows how to use rekordbox cue names to trigger specific MIDI messages. |
Trigger Elements
Here are the sections of a trigger, and how they work:
Comment
The Comment field is a free-form text area you can use to describe the purpose of the trigger, to remind you when you later come back to it. Apart from the trigger index, a number by which Beat Link Trigger identifies the trigger when it is reporting errors or naming related windows (like expression editors, described in the Expressions section), the comment takes up the entire width of the first line of the trigger row.
Watch Menu
The Watch menu tells the trigger what player(s) it should pay attention to. It lets you choose Player 1 through Player 4, as well as two dynamic choices.
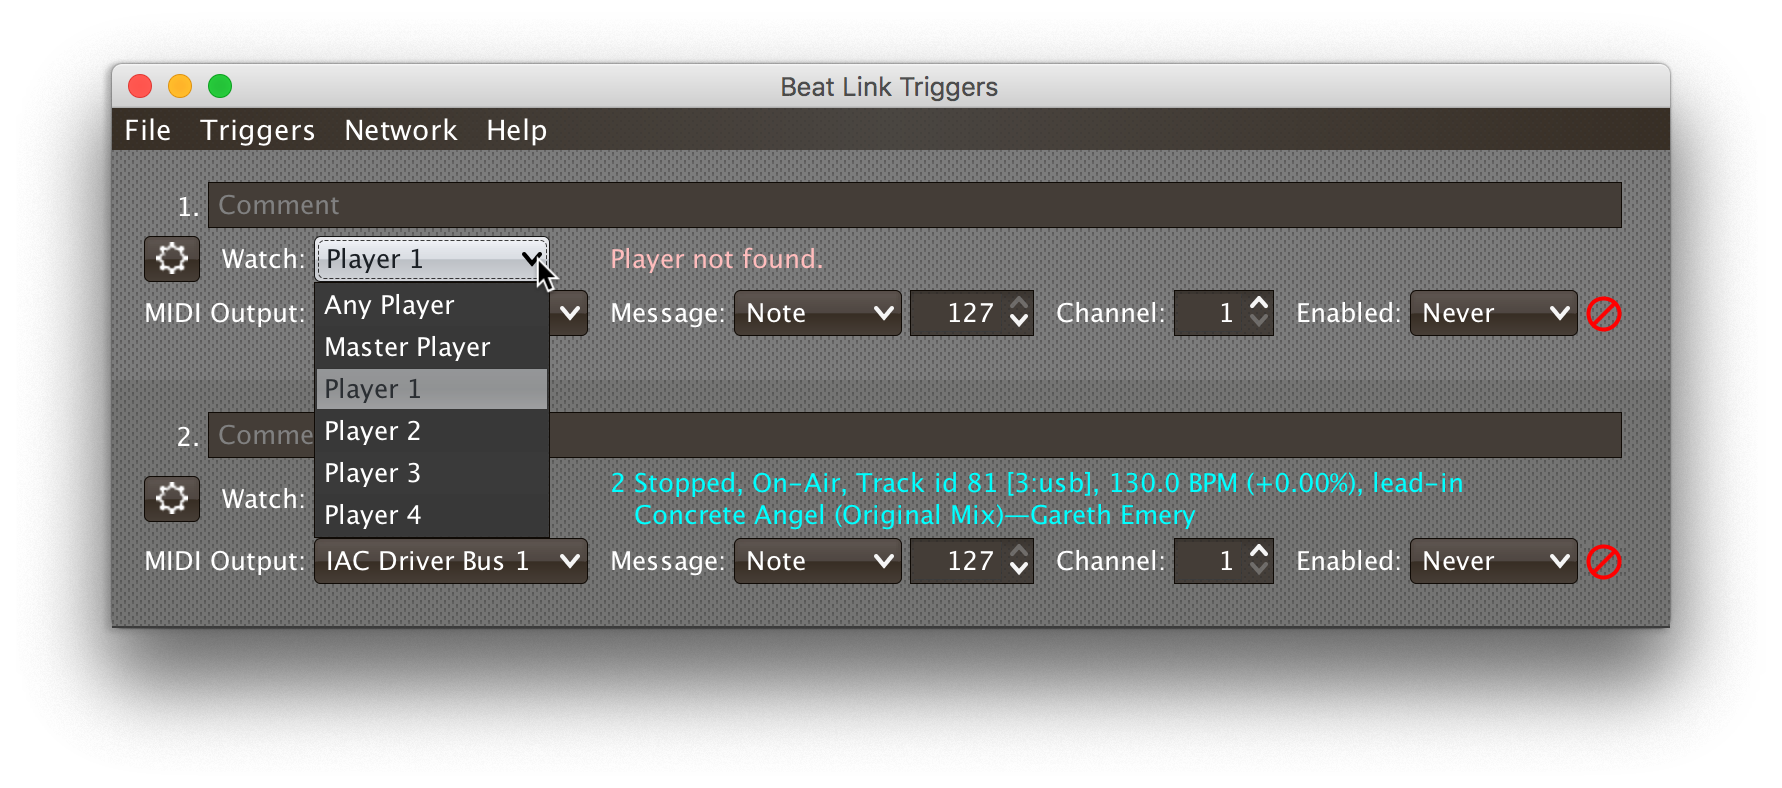
| If a player is chosen which is not currently present on the network, the player will be reported “not found”, and the trigger will not operate until either the player reappears, or a different player is chosen. Of course when you are working in Offline mode, all players will be missing and the trigger will simply say “Offline”. |
- Any Player
-
If you choose to watch Any Player, then just as you would expect, the trigger will respond to activity on any player in the network. It will track whatever player seems “best” at the moment: If there is an Enabled condition which causes the trigger to be enabled for some players and not for others, it will watch the players that enable it. Within that group, if some players are playing and others are not, it will watch the ones that are playing. Finally, if there are still multiple players to choose between, it will pick the lowest-numbered one.
- Master Player
-
If you choose to watch the Master Player, the trigger will focus on whichever player is the current Tempo (sync) Master.
Player Status Summary
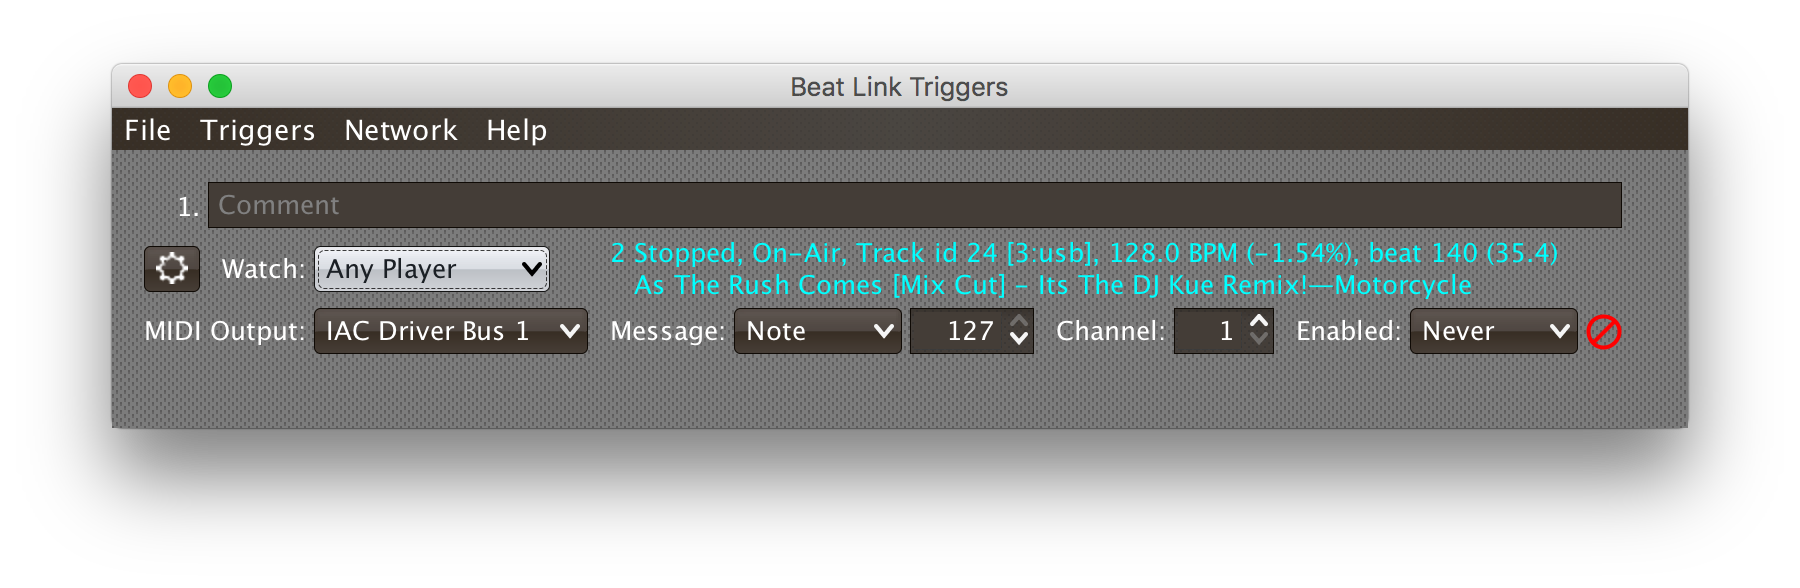
Right after the Watch menu, the trigger row displays the player number and latest status received from the watched player, if one was found. The status includes the current state of the player, information about the loaded track, the current effective BPM and relative pitch, and the number of the current beat.
The track ID is followed by an indication in square brackets of the
player and slot (usb, sd, cd, or rb for rekordbox) from which the
track was loaded. That combination (ID number, source player and slot)
will be unique to that track until that media is unloaded and
replaced. IDs are not unique across players and slots.
These three pieces of information can be used to identify the track
and set up fairly sophisticated custom filter expressions, as
described below. If one of your
expressions recognizes a track, it can tell Beat Link Trigger to
display its name (or any other text you like) instead of the normal
track description by storing your desired description string under the
key :track-description in the trigger locals map. Here is an
example of what that could look like, when a track named Apex has been
recognized, and the string Apex has been stored under
:track-description in the trigger’s locals:

Metadata
Now that Beat Link Trigger can request track metadata from the CDJs in many different ways, that is most convenient and flexible way of matching tracks, and it is always enabled.
When metadata is available for a track, the Player Status section grows to two lines, and displays the track title and artist on the second line, without any effort on the part of your trigger code:
Your trigger can also change the content of the metadata line by
setting whatever value it wants under the key :metadata-summary in
the trigger’s locals. Metadata values available to your trigger
expressions include track-artist, track-comment, track-genre,
track-key, track-label, track-length (in seconds), and
track-title.
Powerful ways to take advantage of this metadata capability are explored in the Matching Tracks section.
Playlist Position
If for some reason you don’t want to see the information provided by the track metadata, and are only interested in the track’s position within a playlist (or physical CD, if one is being played), you can choose . This will display only the track index, which is 1 for the first track, 2 for the second, and so on. To return to the full metadata available, choose ].
MIDI Output Menu
The MIDI Output Menu lets you choose the MIDI device to which the trigger will send messages. It will show all MIDI outputs currently available on your system.
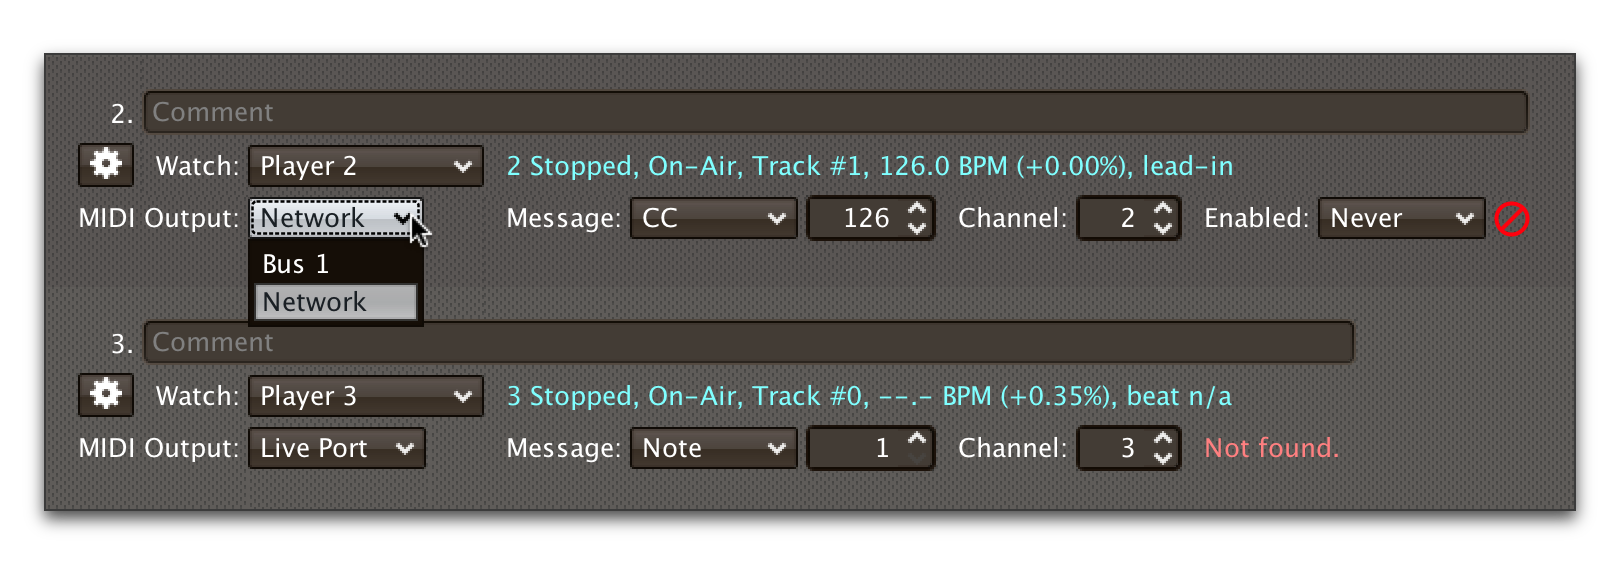
| If a MIDI Output is chosen which is no longer available on the system (as shown in trigger 3 above), it will remain in that row’s menu, but the Enabled section of the trigger will be replaced with the message “Not found.” Once the output reappears, or a different output is chosen, the trigger will become operational again. |
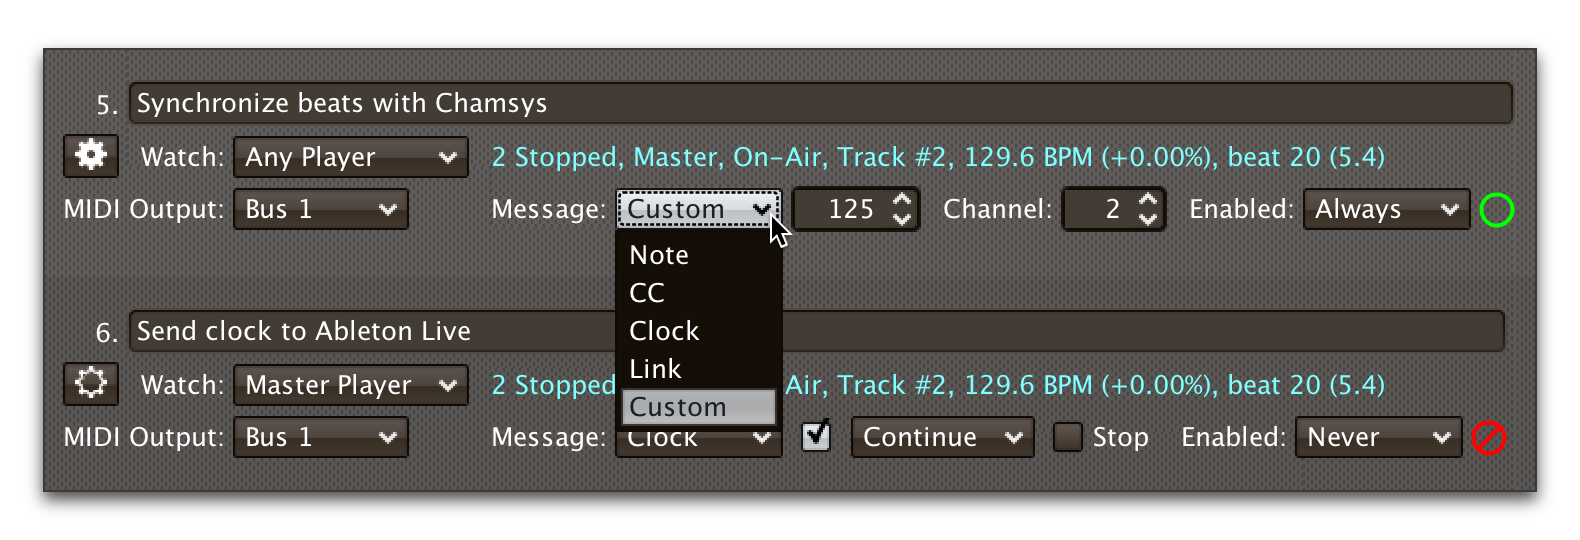
Message Menu
The Message Menu determines what kind of MIDI message is sent by the trigger.
- Note
-
With this setting, the trigger sends a Note On message, with velocity 127 and the note number shown to the right of the menu, when the watched player starts playing (as long as the trigger is enabled), and a Note Off message when the watched player stops or the trigger is disabled.
- CC
-
With this setting, the trigger sends a Control Change message, with value 127 and the controller number shown to the right of the menu, when the watched player starts playing (as long as the trigger is enabled), and sends a CC with value 0 when the player stops or the trigger is disabled.
- Clock
-
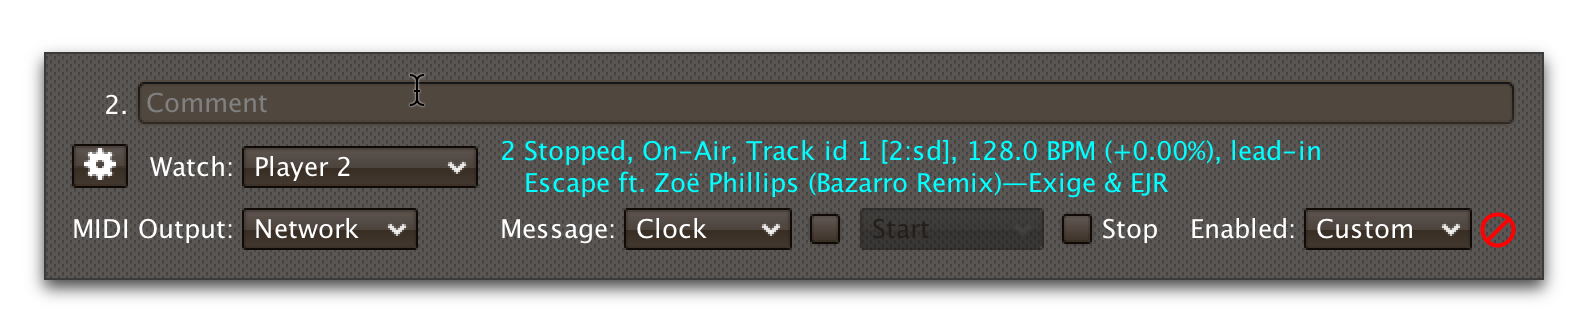
With this setting, the trigger sends MIDI Beat Clock messages whenever the trigger is enabled, to synchronize the tempo of the target device with the tempo reported by the watched player. If the check box to the right of the menu is checked, it will either send a Start or Continue message (as chosen in the following menu) when the watched player starts playing, and if the Stop box is checked, it will send a Stop message when the watched player stops. In special cases, you can also ignore the track tempo and respond only to pitch changes.
MIDI Clock is an old, slow, and imprecise mechanism for synchronizing tempo, especially when sent by a general-purpose operating system like the one running Beat Link Trigger. If at all possible, you should use Ableton Link instead, as described below. You will get much better results. If you have to talk to older hardware that can’t accept Ableton Link, consider still sending Link from Beat Link Trigger, and using a dedicated Ableton Link to MIDI bridge to talk to your older hardware. If you have any iOS devices available, Link to MIDI seems to get good reviews.
In any case, if you are generating MIDI clock directly, make sure you have only one trigger configured to send Clock on a given MIDI port, or you will get crazy results. Since MIDI clock generation uses a great deal of CPU to try to work around the above-mentioned issues, you are probably better off only ever using it with a single trigger anyway.
- Link
-
When this option is chosen, the trigger does not send MIDI messages at all. Instead, when activated, it tries to synchronize an Ableton Link session to the tempo and beat grid being established by the player that it is watching. For this to work, you need to have Carabiner installed, running, and connected, as described in Working with Ableton Link. You can also use expressions, as described below, to send additional messages over MIDI or other communication protocols. As with MIDI clock, you can ignore the track tempo for special-case integrations.
If you are interested in synchronizing an Ableton Link session with the tempo and beat grid of your CDJs, you no longer need to use triggers to do so. With Carabiner running, you can use Passive Sync Mode to have Ableton Link follow the CDJs, and you can even let Ableton Link be the Tempo Master and control the tempo and beat sync of the CDJs using Full Sync Mode.
- Custom
-
When this option is chosen, the trigger will not send any messages on its own, and it is up to you to send them in code you write in the trigger expressions, as described in the Expressions section. This gives you the most flexibility because in addition to MIDI messages, you can send arbitrary UDP packets, HTTP requests, or whatever you might need.
Note/Controller Spinner
Found immediately to the right of the Message Menu (unless Clock or Link is chosen as the Message type), this field lets you set the MIDI note number used for Note messages, or the controller number used for Control Change messages. The value is also available to your trigger expressions if they want to use it.
Channel Spinner
For triggers sending MIDI (other than Beat Clock), this lets you specify the MIDI channel on which messages are sent.
Enabled Menu
The Enabled menu controls when the trigger will respond to the watched player starting or stopping playback.
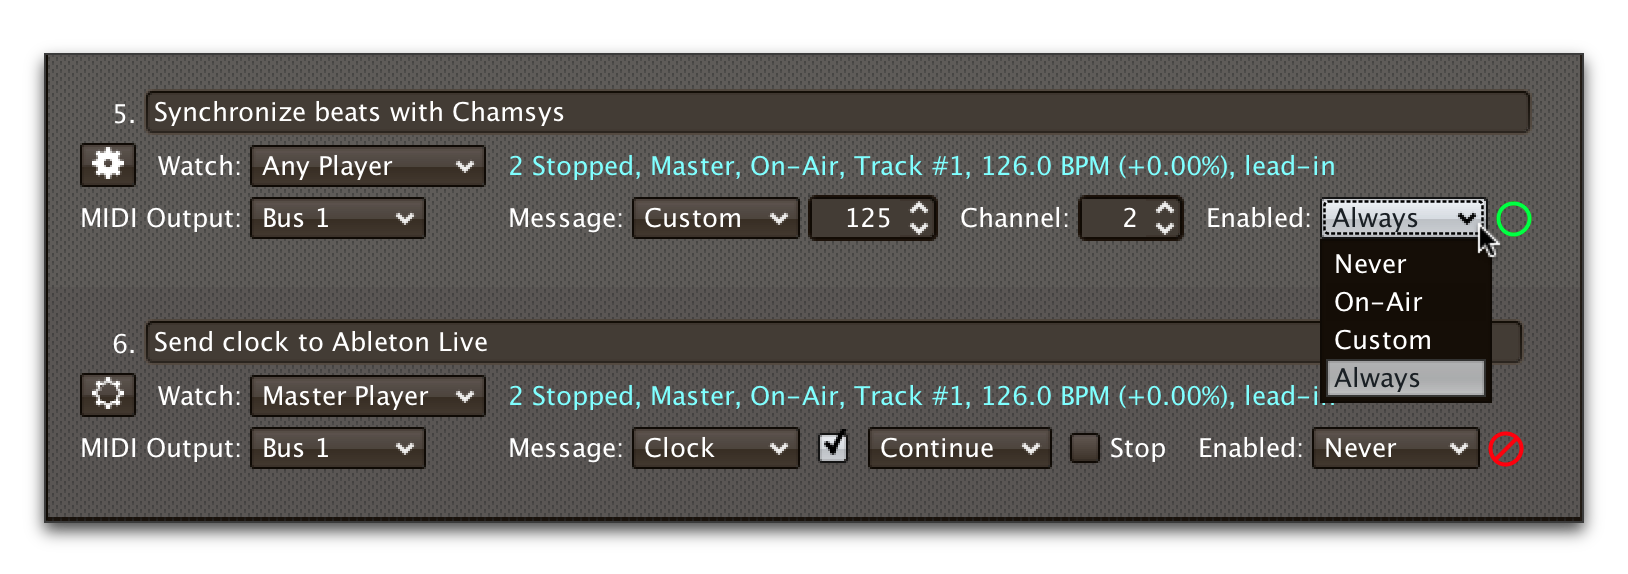
- Always
-
With this setting, the trigger is enabled until you disable it.
- Never
-
With this setting, the trigger is disabled until you re-enable it.
- On-Air
-
With this setting, the trigger is enabled whenever the watched player reports that it is On the Air. (For that to work, the player must be connected to a Nexus mixer, and must have the feature turned on.)
- Custom
-
With this setting, the trigger is controlled by an Enabled Filter, Clojure code that you write yourself. Whenever a status update is received from any watched player, your expressions are evaluated. If the last expression in your filter returns a
truevalue, the trigger will be enabled. This lets you apply sophisticated logic, like enabling the trigger when a particular track is loaded into the player, and it has reached a particular beat during playback. Expressions are further explained in the Expressions section. If you chooseCustomand have not yet written an Enabled Filter expression, the expression editor will be opened to let you do that.
Trigger Status
To the right of the Enabled menu there is a Trigger Status indicator which shows whether the trigger is currently enabled (a green circle) or disabled (a red circle with a slash). If the player is currently playing, there is a filled circle inside the enabled circle:
| State | Indicator |
|---|---|
Disabled, Not Playing |
|
Enabled, Not Playing |
|
Disabled, Playing |
|
Enabled, Playing |
|


Context Menu
Each trigger row has a context menu attached to it, which can be accessed by right-clicking (or control-clicking) anywhere on the row’s background, but you can also open the context menu with a regular mouse click on the button with a gear icon in it. Most of the menu is devoted to editing various expressions to customize the trigger, as described below. The gear icon next to an expression will be filled in if that expression has a value, and the gear in the button will be filled in if any expression associated with the trigger has a value.
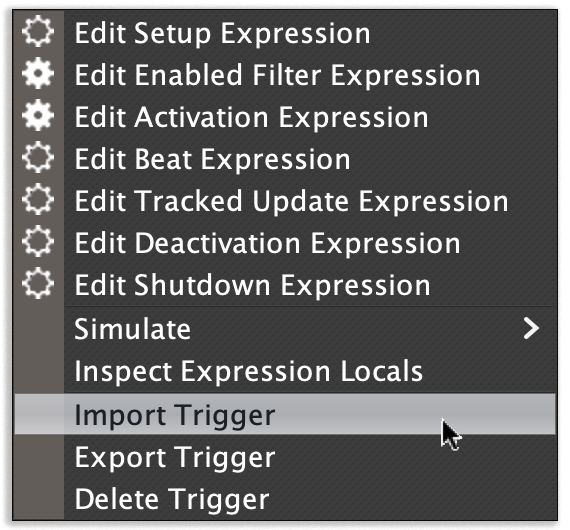
Below the expression editors, the Simulate submenu allows you to test your MIDI mappings and custom expressions as described in the next section.
The Inspect Expression Locals option allows you to explore any values that have been set up by expressions in the Trigger to re-use or share with each other. See Inspecting Locals and Globals for more details.
After that are options with which you can import an exported trigger configuration into the current trigger, or export the current trigger configuration to a text file which can be imported into a different trigger or shared with colleagues. Finally, the Delete Trigger option allows you to delete the trigger, unless it is the only remaining trigger in the window.
Simulating Trigger Events
The Simulate submenu allows you to pretend that an Activation, Deactivation, Beat or Tracked Update event has occurred, and send the corresponding MIDI messages and/or run the custom Expressions you have configured for those situations. Choosing Activation or Deactivation will send the MIDI note or CC message you have configured for the trigger. Chosing any option will run the corresponding Expression if you have created one.
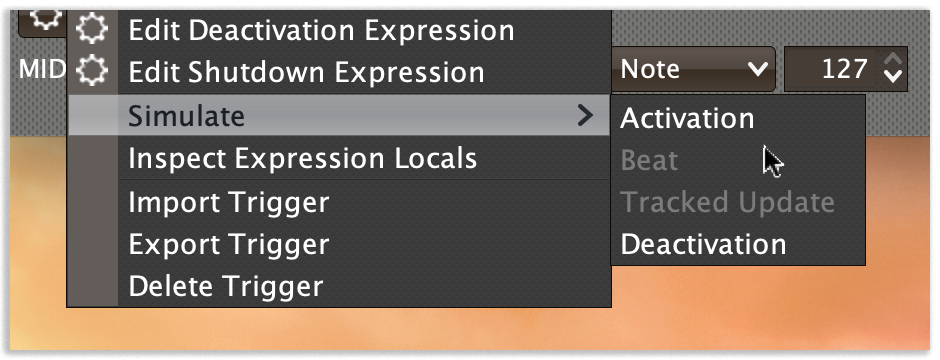
|
This can allow you to set up MIDI mappings in other software, like Ableton Live, that requires actual MIDI messages in order to learn them, even when you are working in offline mode because you don’t currently have access to your CDJs. |
The corresponding option will be disabled if there is no MIDI message or Expression configured for that event.