SMPTE Linear Timecode
Many people want to create SMPTE timecode audio streams that are synchronized with the current playback position of a track. Now that metadata analysis has proceeded to the point that we can read the track beat grids and translate beat numbers to times, this is possible. All that is needed is for someone to write a program that can generate the SMPTE audio, and which can be controlled by triggers in Beat Link Trigger, ideally over a simple protocol like Open Sound Control.
There was at least one team working on this, using the open-source libltc library. However, they got busy with other projects, and it is unclear when they (or anyone) will have time to finish and release their solution.
So in the mean time I am sharing some very experimental daemons that
can be used for this purpose, built using
Max/MSP. Because these embed
Mattijs Kneppers’
smpte~ object to generate the
timecode audio stream, and this Max external is available only for Mac
OS X, my daemons only work on the Mac as well. Also, since they embed
the Max/MSP runtime, they are larger and use more system resources
than a targeted C implementation based on libltc would.
Clint Alves figured out a way to build an Orange Pi solution that generates SMPTE timecode very effectively, and worked with the author of that project to extend it for easy control from Beat Link Trigger. If you are willing to do a little hardware tinkering, this is a much more polished (and inexpensive!) approach than my Max/MSP patch. You can find the details below.
However, if you really want to experiment with SMPTE right now, have a Mac, and can live with these limitations, read on to see how.
LTC using Max/MSP
|
This is wandering outside the core goals of Beat Link Trigger, so the amount of help and support I am going to be able to offer are very limited. You may not want to dive too deep into this unless you are, or have access to, a Max/MSP expert. Also please keep in mind the warning in the Player Status Window section about how time information can only be reliable when tracks are being played forwards, without loops. |
Generating a Single SMPTE Stream
The original request people had was to be able to set up a trigger
that was enabled when a particular track is playing on a player, and
generated SMPTE timecode audio corresponding to the playback position
and speed of that track. The first daemon and trigger I created
support this approach. You can download the daemon app at
http://deepsymmetry.org/media/smpted.zip and the corresponding trigger
at http://deepsymmetry.org/media/SMPTE.bltx (to use an exported
trigger like that, create a trigger row in Beat Link Trigger, then
click on its action [gear] menu and choose Import Trigger):

As downloaded, that trigger is configured to watch Player 3, but you can set it to watch whatever you want, including the Master Player or Any Player, using the normal Beat Link Trigger interface.
|
Working with track times requires solid metadata access, and also
needs the Beat Link If you also want your trigger to only be enabled when a particular track is loaded, you should combine that logic with this check, for example: |
When you run the daemon, it opens a small window which shows its configuration and status:
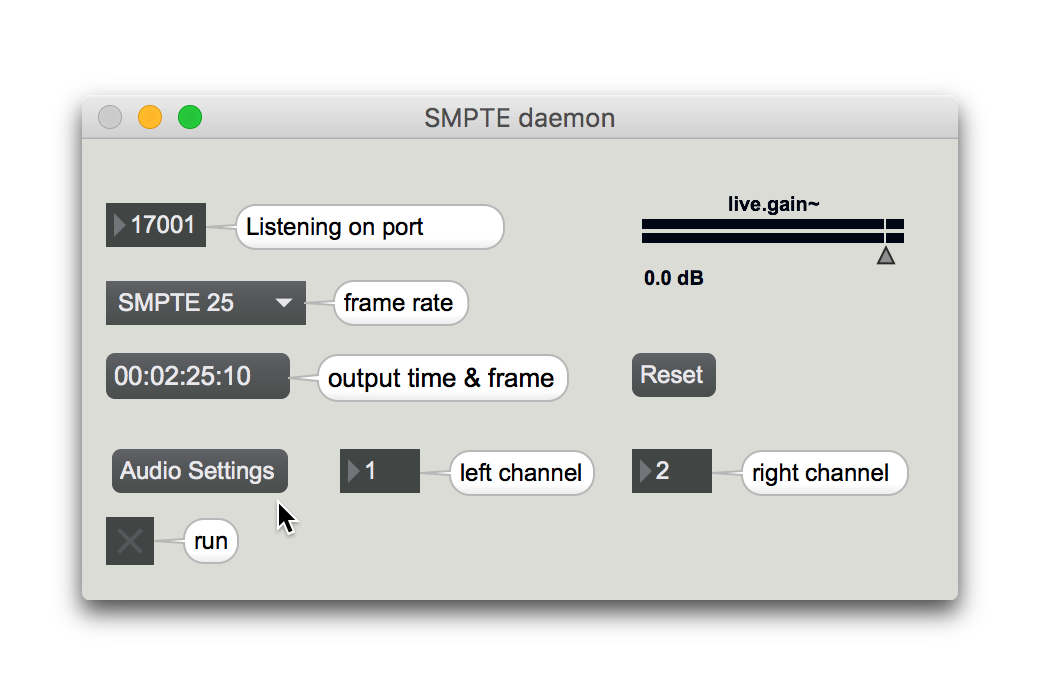
The main thing you are likely to want to change here is the SMPTE frame rate, which you can do in the dropdown menu. You can also pick the sound card that will be used to send the audio by clicking the Audio Settings button, and you can choose which two channels of that audio card are used by the daemon in the channel boxes to the right. See the Max/MSP documentation for more information on audio configuration.
If you need to change the port number that the daemon uses, you can do so at the top left of the window, but you will also need to edit the trigger’s Setup Expression to match (the port number appears at the end of the first line):
(let [client  (osc/osc-client "localhost" 17001)
	 handler (reify org.deepsymmetry.beatlink.data.TrackPositionListener
                (movementChanged [this update]
                  (overtone.osc/osc-send client "/time"
                                         (int (.milliseconds update)))
                  (overtone.osc/osc-send client "/speed"
                                         (float (.pitch update)))))]
  (swap! locals assoc :smpted client
                      :handler handler))
You can also, if needed, adjust the gain (volume) of the SMPTE signal
using the live.gain~ slider at the top right.
With the daemon running and configured, when your trigger activates, SMPTE LTC audio will be generated on the specified outputs, synchronized to the current playback position of the track being watched by the trigger. You will be able to see the time and frame being output by the daemon just below the frame rate.
You can explore more details of how the trigger works by looking at its Activation and Deactivation expressions, and the Shutdown expression which cleans up the resources used to communicate with the daemon.
If you have Max/MSP and want to study and perhaps modify the implementation of the daemon itself, you can find the patch that builds the application on the Deep Symmetry website (here is what it looks like in patcher mode, unlocked):
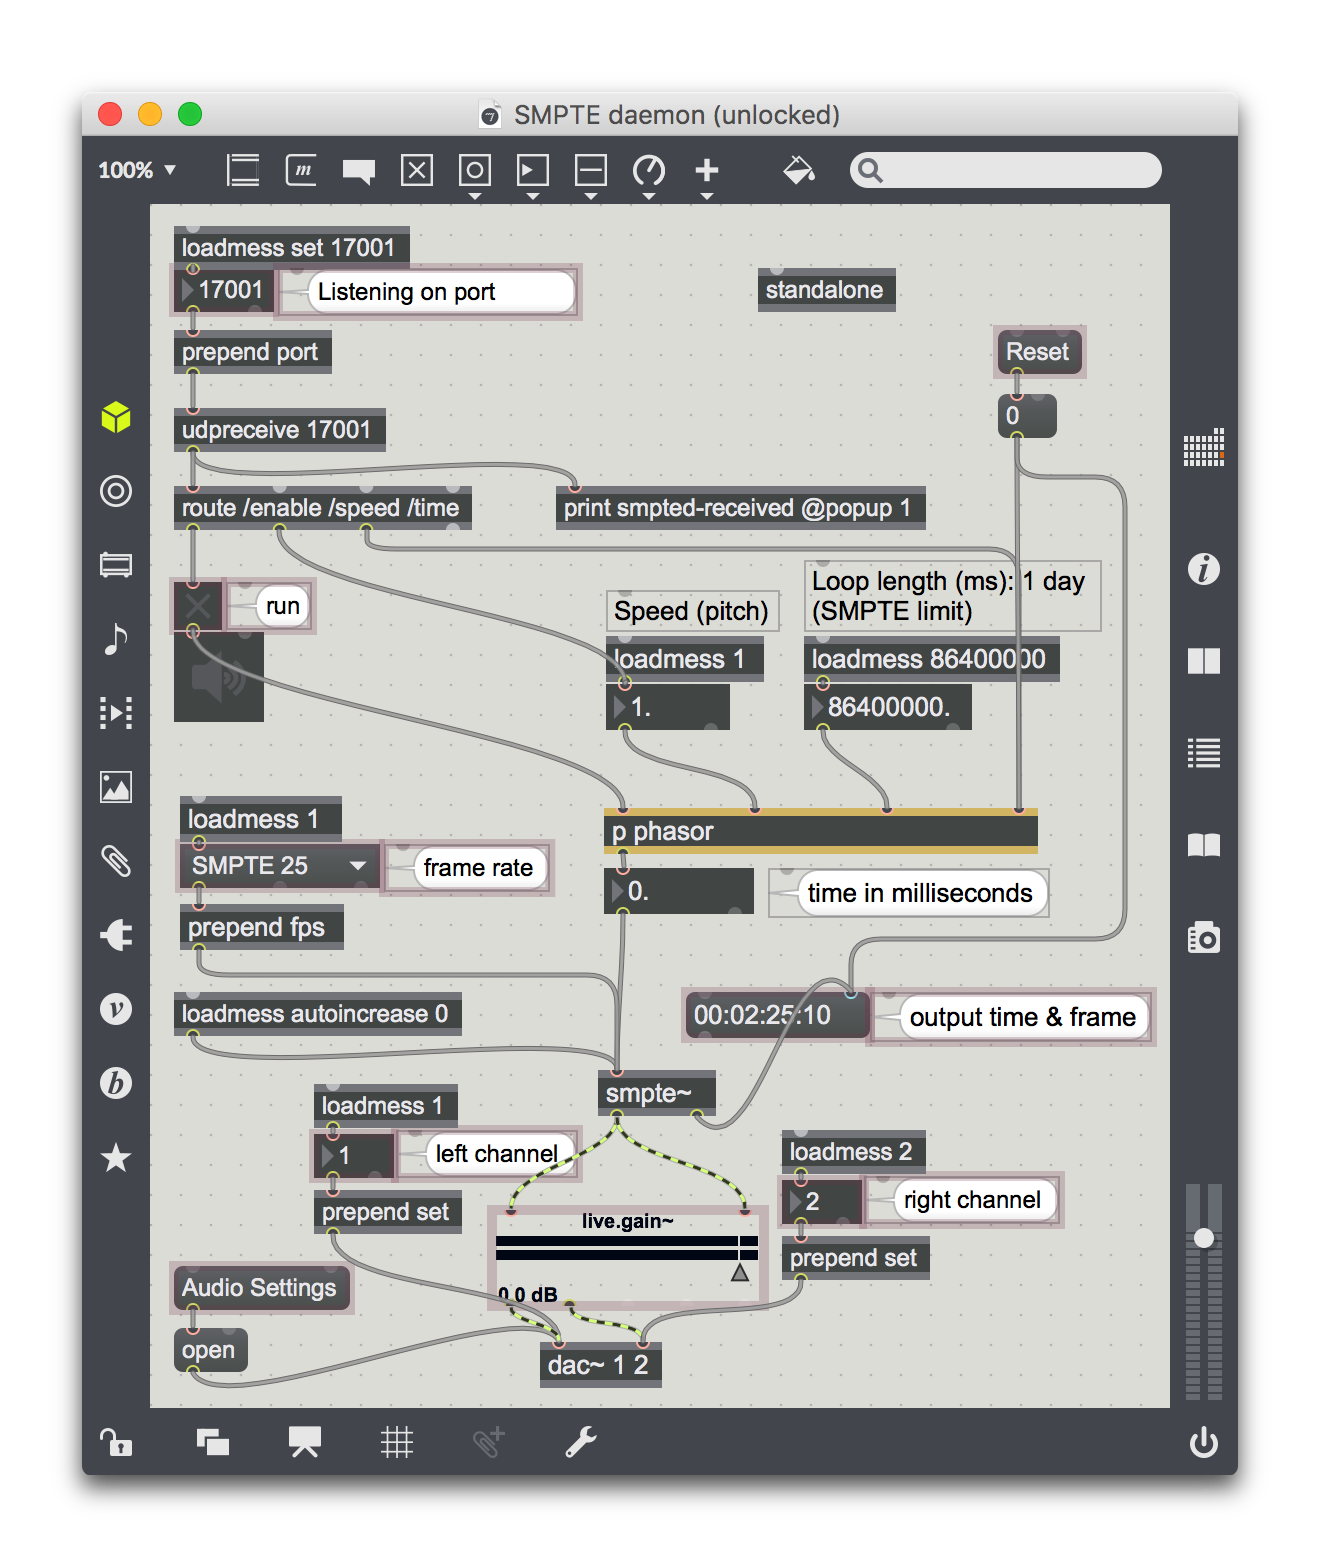
As noted above, you need Mattijs Kneppers’ smpte~ object to work with this patch; you can find that at https://cycling74.com/tools/smpte/
Generating Two SMPTE Streams
Once people discovered the single stream implementation, it turned out that another common desire was to be able to generate two SMPTE streams at the same time, to sync to two different active players. So I eventually created a modified version of my daemon that supports this scenario. You can download the dual-stream daemon app and the corresponding left channel and right channel triggers from the Deep Symmetry web site (please read the single-stream explanation above for details about how to import the trigger files, and about audio configuration of the daemon, which is the same here).
As downloaded, the left trigger is configured to watch Player 2, and the right trigger to watch Player 3, but you can change that using the normal Beat Link Trigger interface.
When you run the dual daemon, it opens a slightly larger window for its configuration and status, but the content should be familiar compared to what you saw above:
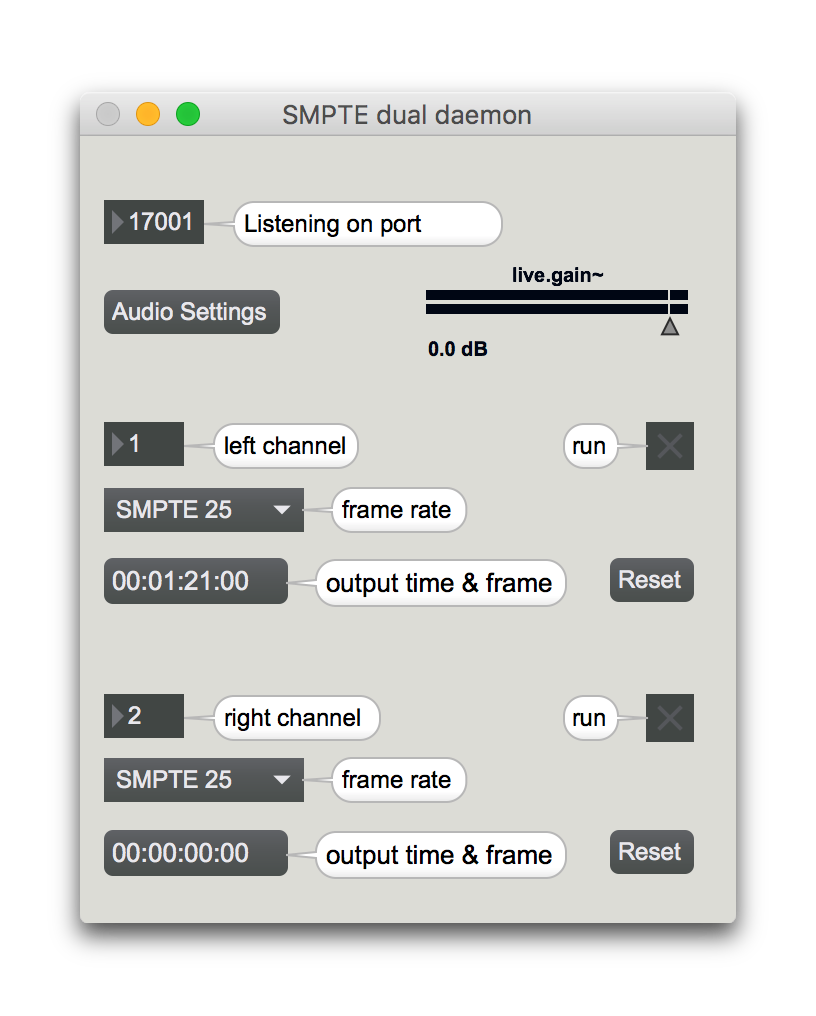
The top section allows you to configure global settings like the port number, audio configuration, and gain. Then there are two separate sections for the left and right channel where you can configure which port on on the audio interface they should use, the SMPTE frame rate for each, and view the current state and time being generated for each.
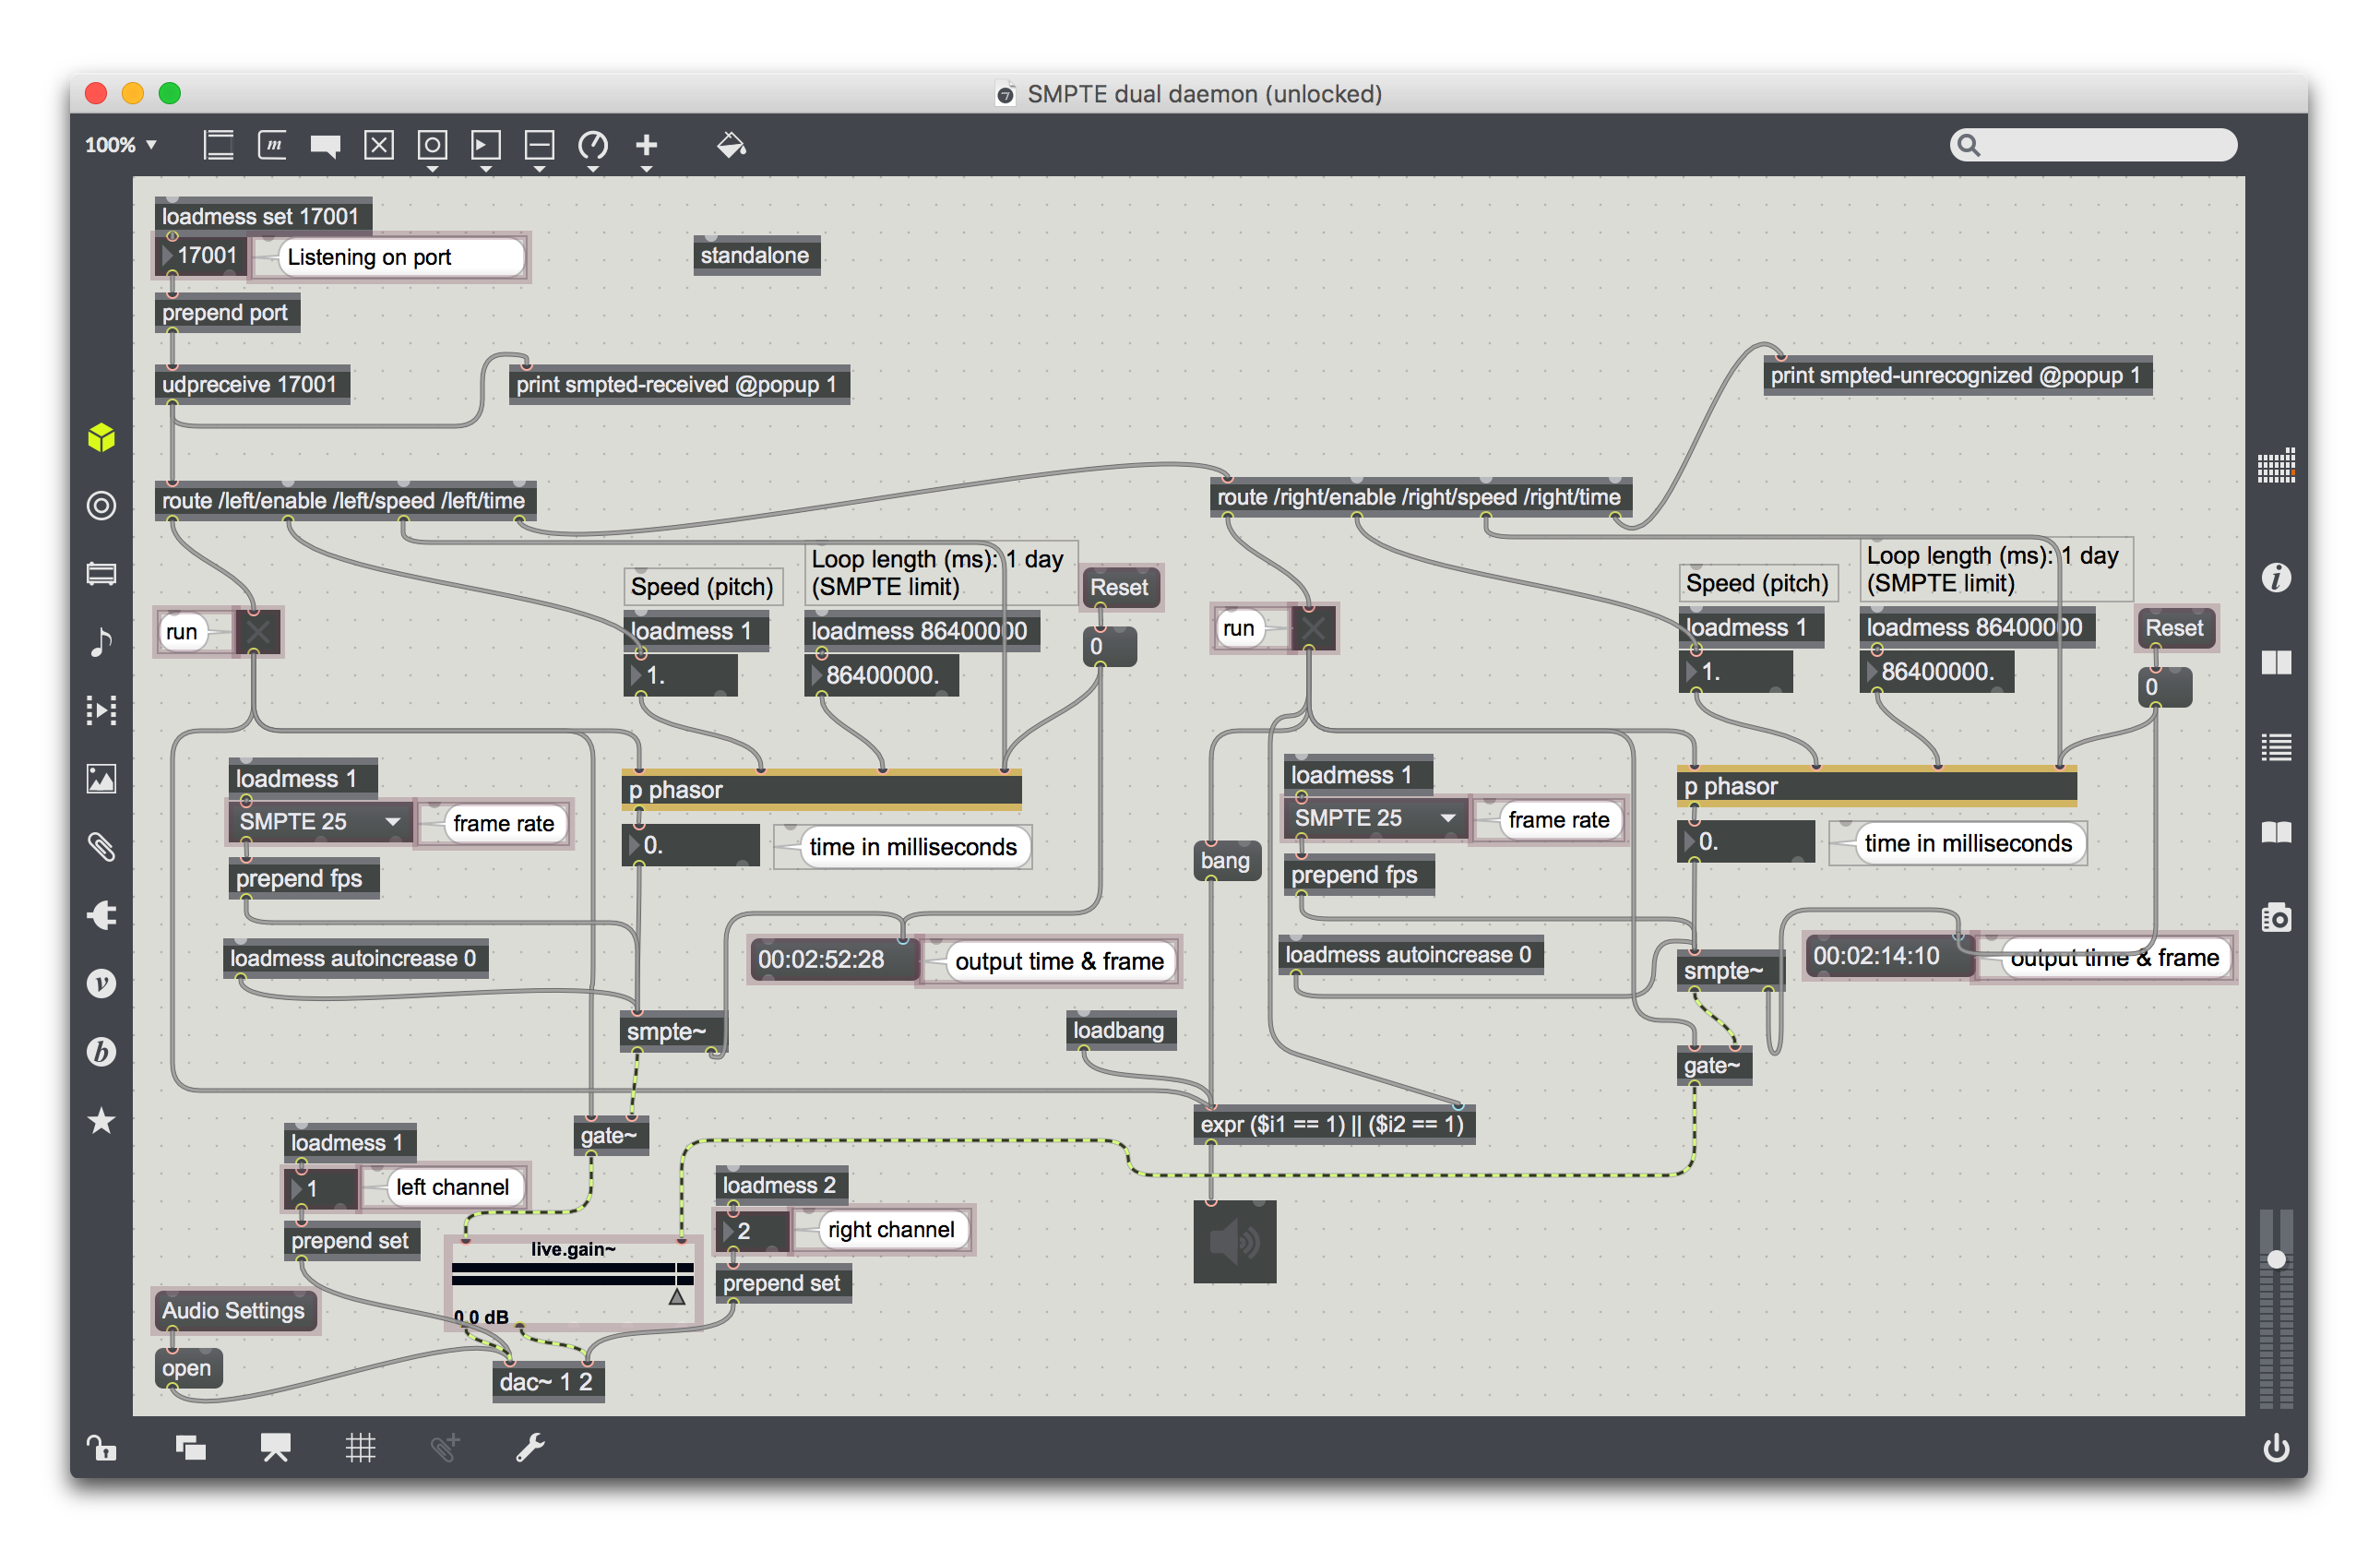
Again, you can study the trigger expressions to learn more about how they work, and if you have Max/MSP and want to study or modify the daemon itself, the patch source for it is also on the Deep Symmetry website (here is what it looks like in patcher mode, unlocked):
Again, I hope this is useful to intrepid explorers who want to try working with SMPTE, but please don’t expect me to be able to offer intensive or detailed support: I don’t use SMPTE myself, created these experimental daemons to prove that it is possible, and we are all waiting for someone to create a more robust and permanent solution. If you can help do that, please let us know!
LTC using an Orange Pi
|
This is wandering outside the core goals of Beat Link Trigger,
so the amount of help and support I am going to be able to offer are
very limited. You can look for help on Orange Pi forums and from the
author of the firmware described below, and Clint may be able to help
(he is Also please keep in mind the warning in the Player Status Window section about how time information can only be reliable when tracks are being played forwards, without loops. |
The first thing you will need is an Orange Pi Zero board, an enclosure and a power supply. Then you will need the LTC SMPTE Timecode project uImage file to boot from. If you want a display to show the timecode being generated, there are some compatible options. Look on the project page for more information, or ask on the Zulip stream. Clint and I worked with the developer to arrange for the project to support OSC commands that would allow Beat Link Trigger to control it.
Clint’s written a guide to getting started with the Orange Pi project in the Beat Link Trigger Wiki. You can check it out here (internet connection required).
Controlling the Pi using a Show
Once you have the Pi built and working, you can load this show file in Beat Link Trigger.
| Even if you are more accustomed to using the older, low-level Triggers approach to working with Beat Link Trigger, a Show makes more sense for working with timecode, because it’s going to be very track-specific. So this is a good chance to learn how this new feature can make your life easier in other contexts too! |
You will need to edit line 1 of the Came Online expression to match
the IP address that the Pi is using, and the port number its OSC
server is listening on, so BLT knows how to reach it.
If you have changed the host name of your Orange Pi, you will need to
edit line 3 of the Shared Functions to reflect the name you chose.
The example track that’s in the show, A Heavy Abacus, is just a
placeholder so you can copy its Loaded and Unloaded expressions
into the tracks that you actually want to use. So start by
importing your actual tracks into the
show, either from a player on the network, or from a rekordbox USB or
SD card. Once your tracks are added, copy and paste the content of the
Loaded and Unloaded expressions in A Heavy Abacus to the
corresponding expressions in your own tracks. Once that’s done, you
can delete A Heavy Abacus.
As you may have noticed, you can edit the first two lines of the
Loaded expression once it is installed into each of your tracks to
establish the timecode frame rate for that track, as well as an offset
(in hours) to add to the track’s playback position when generating
timecode for that track. This allows separate video content to be
configured in Resolume (or whatever video software you are using) for
each track, and activated by the non-overlapping time code values.
Alternately, you could add more code to the Loaded expressions to
send OSC, MIDI, or other types of messages to your video software to
cue up the appropriate content when the track loads.
Once one of your configured tracks starts playing, the show will tell
the Pi to start sending timecode based on the playback position of the
player that is playing the track, with the frame rate and offset
specified at the start of the Loaded expression.
This show doesn’t handle mutiple players playing the same configured track at once, or even two different configured tracks playing on different players. Such refinements are possible, by making the code more sophisticated. If you would like help doing that, please ask on the Zulip stream.
Controlling the Pi using a Trigger
If you really do want to use an older Triggers-based approach, you can load this configuration file in Beat Link Trigger, configure it to talk to the IP address of the Pi, and it will generate timecode that tracks the on-air master player.
| Because it is a full configuration file, it will replace any triggers you have defined in Beat Link Trigger, so if you care about any of them, be sure to save your existing configuration to a separate file so you can reload them when you are done working with the Pi. You can also export individual triggers to files so you can import them into the Orange Pi configuration if you like. |
As with the Show approach, you will need to edit line 1 of the Came
Online expression to match the IP address that the Pi is using, and
the port number its OSC server is listening on, so BLT knows how to
reach it. You can also specify the frame rate for the generated
timecode on line 2.
If you have changed the host name of your Orange Pi, you will need to
edit line 3 of the Shared Functions to reflect the name you chose.
Other than that, the expressions should work as they are, and you are free to explore them to see how they work.
If your players aren’t set up with a mixer that manages their on-air
state, you will want to change the trigger’s Enabled filter from
On-Air to Always. And if you want to track a specific player
instead of the Master player, you can change its Watch setting from
Master Player to something else.